
Keeping up with the recommended oil-change schedule is essential for the performance and longevity of your ATV. While the ATV is under warranty, most manufacturers require that the machine is serviced at a certified dealer. But as soon as the warranty expires, you might want to perform the oil changes yourself to save money.
In this guide, you’ll learn how to:
- Change ATV engine oil
- Change ATV front and rear gearcase (differential) oil.
- Change ATV transmission oil.
The procedures only require a bare minimum of mechanical skills. Just be careful not to skip any of the steps. The entire process will take 1-2 hours if you change all the oils.
Tools and Supplies You’ll Need
As the saying goes, having the proper tools is half the job.
These are the tools and supplies you’ll need to change the oil on your ATV:
- A Socket wrench set with an extension and ratchet.
- Torx and hex bits. While Allen keys might work, I prefer bit sockets that attach to a ratchet for more power and control.
- A universal oil filter tool or an oil filter wrench. On some ATVs, the filter is easy to access and can be removed with almost any universal oil filter removal tool. However, some models have limited access, and you’ll need a dedicated tool. An oil filter wrench is a socket the same size as the oil filter that attaches to a ratchet.
- A Suitable drain pan to collect the drained oil.
- A suitable funnel. I recommend getting one with a hose attachment to access hard-to-reach fill ports.
- Oil. Please refer to the owner’s manual for the correct oil specification, weight, and quantity. If the bike is still under warranty, you should only use brands and specs of oil recommended by the manufacturer. After the warranty runs out, you will likely have no issues as long as you use a quality brand of oil that meets the minimum specs and requirements provided by the manufacturer.
- A new oil filter. Ensure it’s the same size as the old filter. Look up the parts number to ensure you get the right one.
- New copper or aluminum sealing washer for the drain plug. Re-using the old washer increases the chance of leaks.
- Rubber gloves. Short exposure to oil is usually not harmful, but extended exposure can lead to skin redding, swelling, and burning.
- Rags or paper towels and some absorbent to clean up spills.
How to Replace ATV Engine Oil – Step-by-Step
Now let’s begin with the process of changing the engine oil.
1. Position the ATV on a Level Surface
The ATV needs to be level to get an accurate oil level reading. Working on a smooth and level surface will reduce the risk of accidents, oil spills and make the job much more comfortable.
Place the transmission in “park” and apply the hand brake to prevent it from moving.
2. Start the Engine and Allow It to Idle for 2-3 Minutes
Start the engine, allow it to idle for 2-3 minutes, then stop it.
Cold oil has a thick and sticky consistency (high viscosity) and won’t drain well if you try to perform this job when the engine is cold.
Allowing the engine idle for a few minutes heats the oil, making it more fluid (lower viscosity), which enables it to drain much better.
Note that there is no need to take a long ride to make the oil even hotter and more fluid. Doing so will cause a risk of burns when changing the oil.
Because of the potential risk of getting burnt by touching either hot oil or hot engine components, you should avoid changing the oil when the engine and oil are too hot.
3. Clean the Area Around the Drain Plug
Use a rag to remove any contaminants like dirt or debris.
The drain plug is located at the lowest part of the engine, at the bottom of the crankcase. Look for a cut-out in the guard plate underneath the bike.
On some models, you must remove a protective cover to access the plug underneath the ATV.
4. Place a Drain Pan Under the Drain Plug
The drain pan must be large enough to contain all the engine’s oil.
A capacity of one gallon (3,8 liters) is sufficient for most ATVs but refer to the user manual to verify you’re using a proper size pan. Expect the same amount of oil to be drained as the new oil you will put in.
If the oil levels seem low, your ATV may be burning oil. Learn why some ATVs burn oil and how to prevent it.
The cheapest alternative for collecting the used oil is as simple as using an old plastic jug cut in half. Note that this option involves an increased risk of spilling oil when draining it or pouring it into a container for proper recycling.
A better option is to get a proper stable drain pan or one with a built-in container to store the used oil. These are relatively inexpensive and well worth the investment.
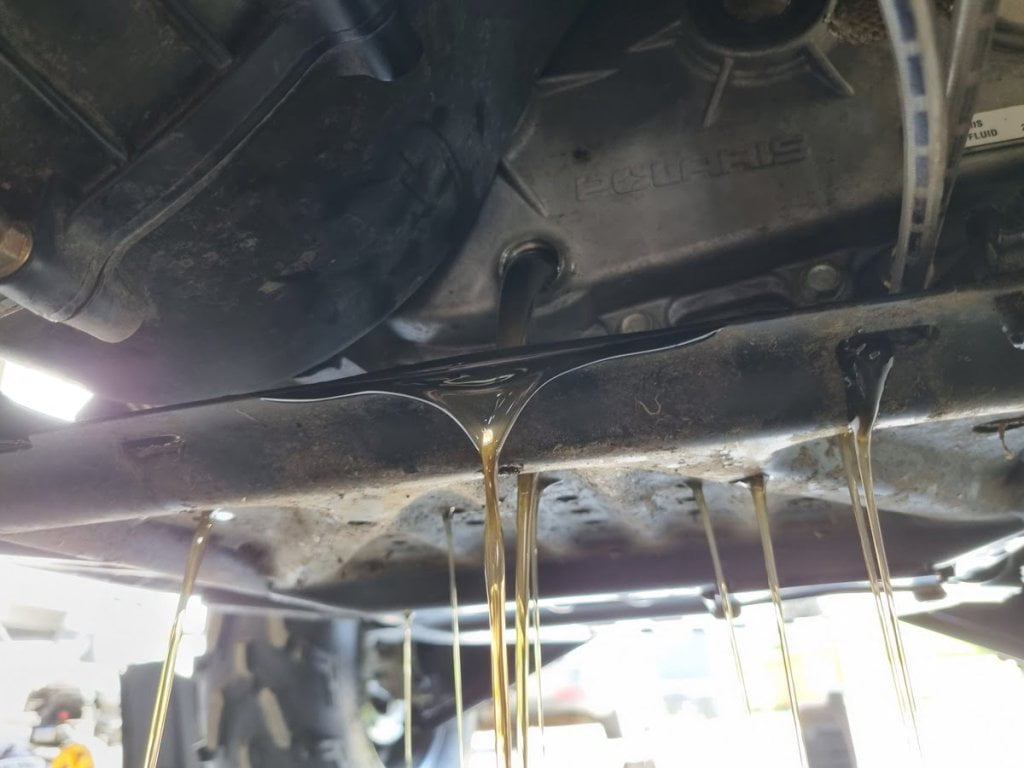
5. Remove the Drain Plug and Allow the Oil to Drain
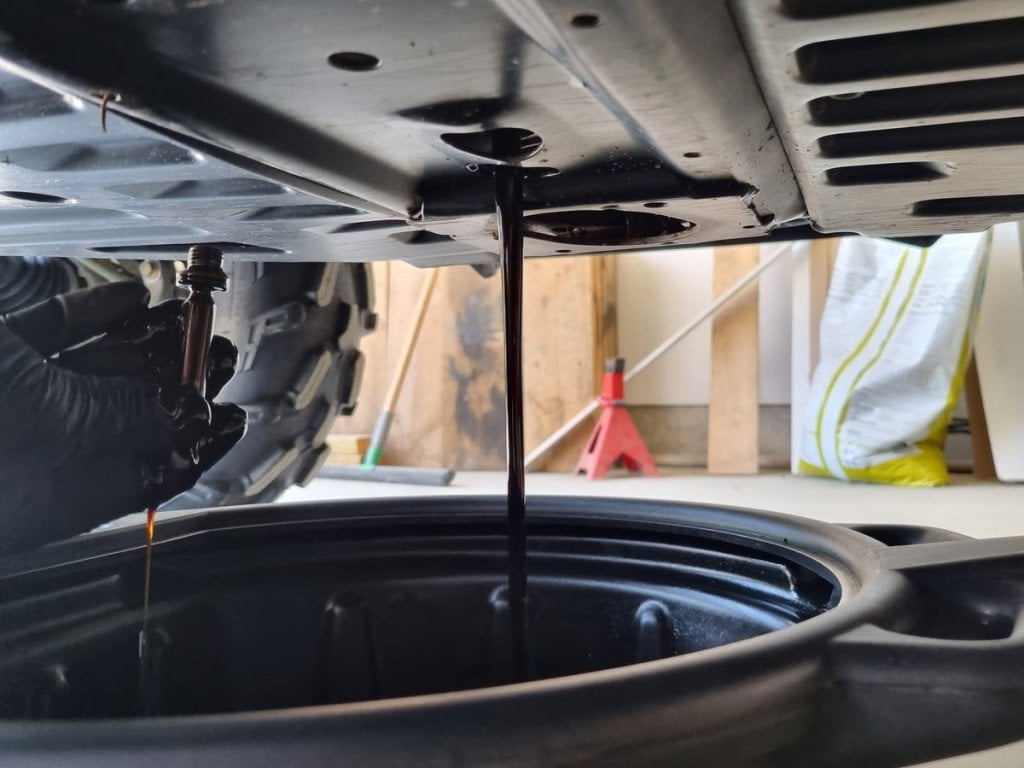
Use the proper size socket and the ratchet to loosen the plug slightly.
Then remove the ratchet and continue unthreading the plug by hand.
As the plug comes out, swiftly move it down to the side to get your hand away from the oil stream. While it is possible to use tools to remove the plug, I find that I have more control when using my hands for the last part.
If you drop the plug into the oil pan, don’t worry. Just fish it out with a magnet or use rubber gloves when the oil has completely drained.
Allow the ATV to sit for a few minutes for the oil to drain completely.
6. Prepare the Drain Plug
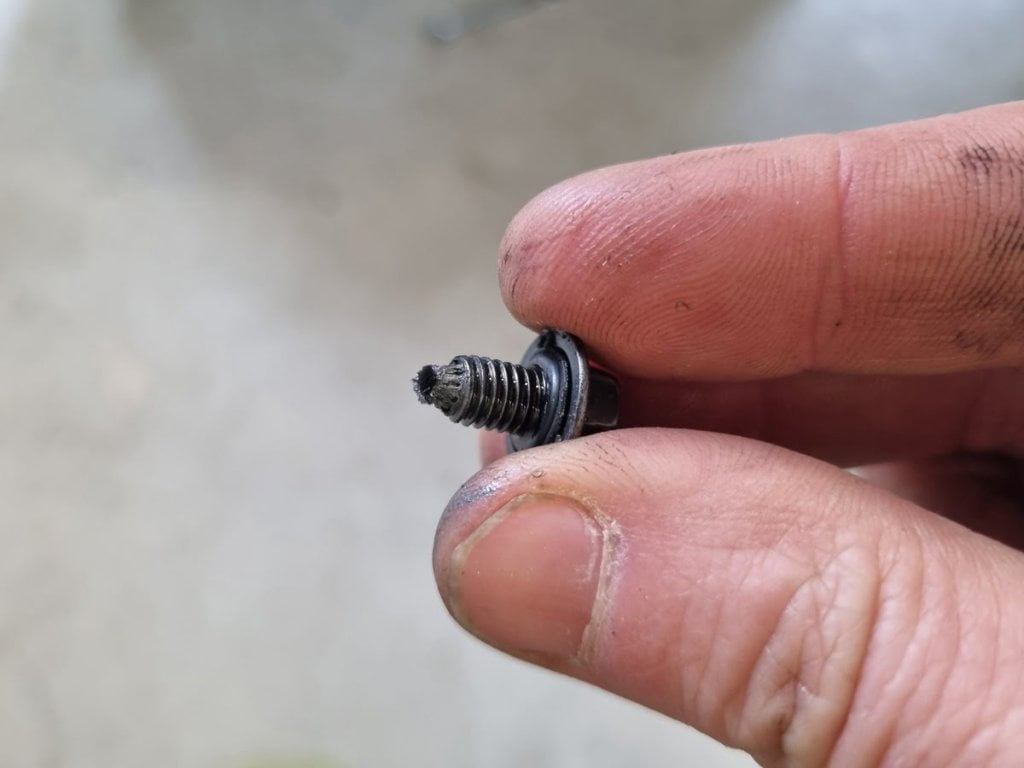
Use a rag to clean the treads and the magnetic tip of the drain plug. The purpose of the magnetic tip is to catch any fine metal particles from engine break-in or everyday wear.
If there is an excessive amount of metal particles on the magnet, or if there are some larger pieces to be found, consider talking to your dealer or certified mechanic to make sure there are no issues with the motor that needs attention.

Remove the old sealing washer from the drain plug and replace it with a new of the same size.
The washer is made of a soft material such as aluminum or copper, so it will crush slightly when tightening the drain plug. This helps take up any imperfections and make for a proper seal.
Ideally, replacing the crush washer each time you change the oil on the ATV would be best. But usually, you will be fine re-using it several times before it can no longer seal properly.
Ensure the sealing surfaces on the crankcase is clean and free of burrs, nicks, or scratches.
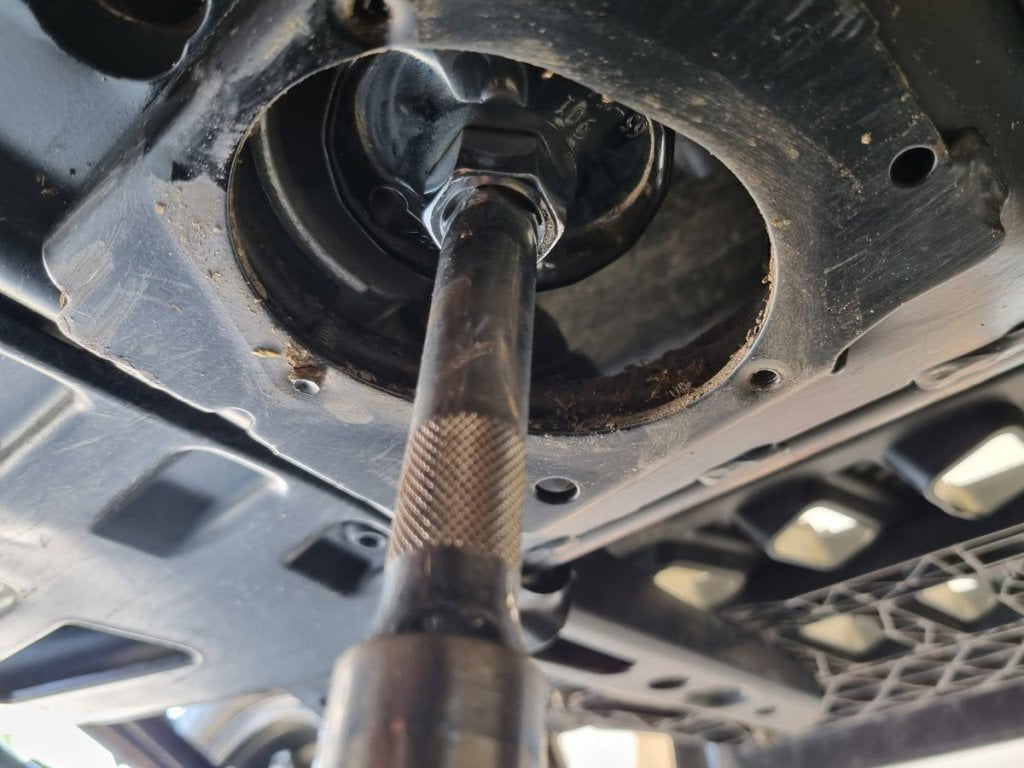
7. Reinstall the Drain Plug
Reinstall the drain plug. Begin threading by hand to ensure it enters correctly. The threads are made out of aluminum and will break if the plug doesn’t enter at a straight angle.
If the threads won’t enter without having to apply force, stop – back of half a turn and start over.
Tighten by hand until the bolt has appropriately entered, then torque to spec (usually 15 to 20Nm).
Most people don’t own a torque wrench. If you torque by feel, be careful not to overtighten, as you risk stripping the treads. The plug should be snug.
All hope is not lost if you mess up and strip the threads. A mechanic can drill out the old treads and install new thread inserts.
However, you are much better off not damaging the threads in the first place. So, once more, do not over-tighten. It is better having to snug up the plug later if it didn’t seal properly the first time.
8. Remove the Oil Filter
Place a shop towel under the oil filter area to collect oil spills. Depending on the make and model, you might need to remove a protective cover to access the oil filter.
Using the oil filter wrench or oil filter removal tool, turn the oil filter counterclockwise to remove it. Ensure the old rubber seal comes off with the old filter.

9. Clean the Filter Sealing Surface

Use a clean, dry rag to clean the crankcase sealing surface. Inspect the surface for signs of corrosion. Use some fine grit sandpaper to remove any corrosion.
10. Lubricate the Rubber O-Ring on the New Filter
Before you install the new filter, apply a thin film of fresh engine oil to the rubber gasket. Inspect the gasket to ensure it’s in good condition and seats properly onto the filter.
If the filter is threaded from the bottom and up, fill it with fresh engine oil before installing it. ATVs with filters installed from the top or side should not be filled with oil before installation.
11. Install the New Filter
Carefully thread the new filter onto the engine. Rotate the filter clockwise by hand until you feel the filter gasket touches the sealing surface, and then turn it an additional ½ – ¾ turn.
Look for instructions on filter tightness on the filter sidewalls.
If you have proper access, you can tighten it by hand. If you need to use a tool, be careful not to overtighten it. It’s better having to re-tighten later than to strip the fragile threads.
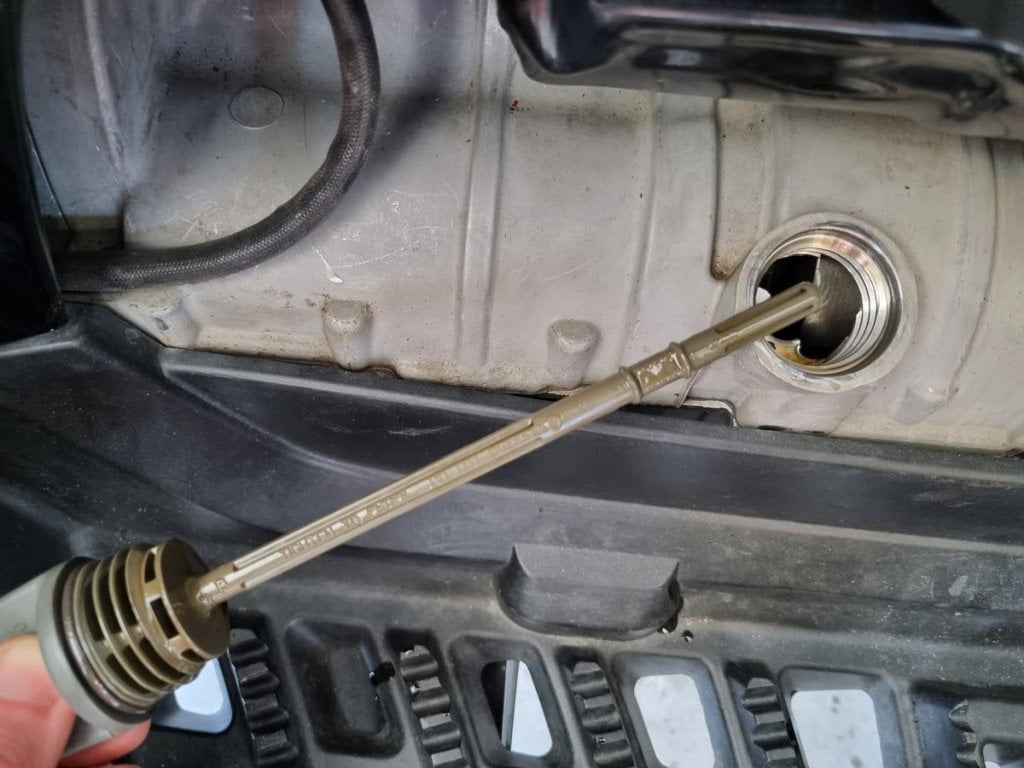
12. Remove the Dipstick and Add New Oil
On most ATVs, you add the new oil through the dipstick opening. Use a suitable funnel and add the specified amount of recommended oil.
If you do not know how much oil you should use, add about 80% of the amount you drained. Use the dipstick regularly to check the level as you add more oil.
Do not fill more than the maximum level marked on the dipstick, which may damage the engine.
Reinstall the dipstick.
13. Start the Engine and Allow It to Idle for 1-2 Minutes
Ensure the transmission is in park (P), start the engine, and allow it to idle for 1-2 minutes.
Idling the engine for a short while distributes the new oil throughout the engine and removes any pockets of air.
Stop the engine.
14. Check the Oil Level and Check for Leaks
Check the oil level after stopping the engine and letting it sit for a minute to allow the oil to set.
To get a proper reading, remove the dipstick, wipe it clean, and thread it back in completely. Then remove it once more to check the current oil level.
Add oil as needed to bring the level up to the upper mark on the dipstick.
Check for leaks by the oil filter and drain plug. Snug up slightly if there are signs of leaks.
15. Dispose of the Used Oil and Filter Properly
Place the oil filter in a plastic bag to prevent spills, and pour the used oil into an empty container. Please take it to your local recycling center for proper disposal.
How to Replace ATV Transmission Oil: Step-By-Step
Depending on the specified oil change intervals, you might need to change the transmission oil simultaneously as you change the engine oil.
1. Access the Transmission Case
Remove any panels or covers to access the lowest part of the transmission case.
2. Place a Drain Pan Under the Gearcase
Depending on your ATVs design, the stream of oil from draining the transmission can be somewhat unpredictable. I recommend using a reasonably large drain pan to reduce the risk of spills.
3. Remove the Drain Plug and Allow the Oil to Drain
The drain plug is located at the lowest part of the transmission case.
Remove the plug and allow the oil to drain completely; this will take several minutes. Clean the drain plug while you wait.
4. Reinstall the Drain Plug
Torque to specification, usually 15 to 20 Nm, but always refer to the owner’s manual.
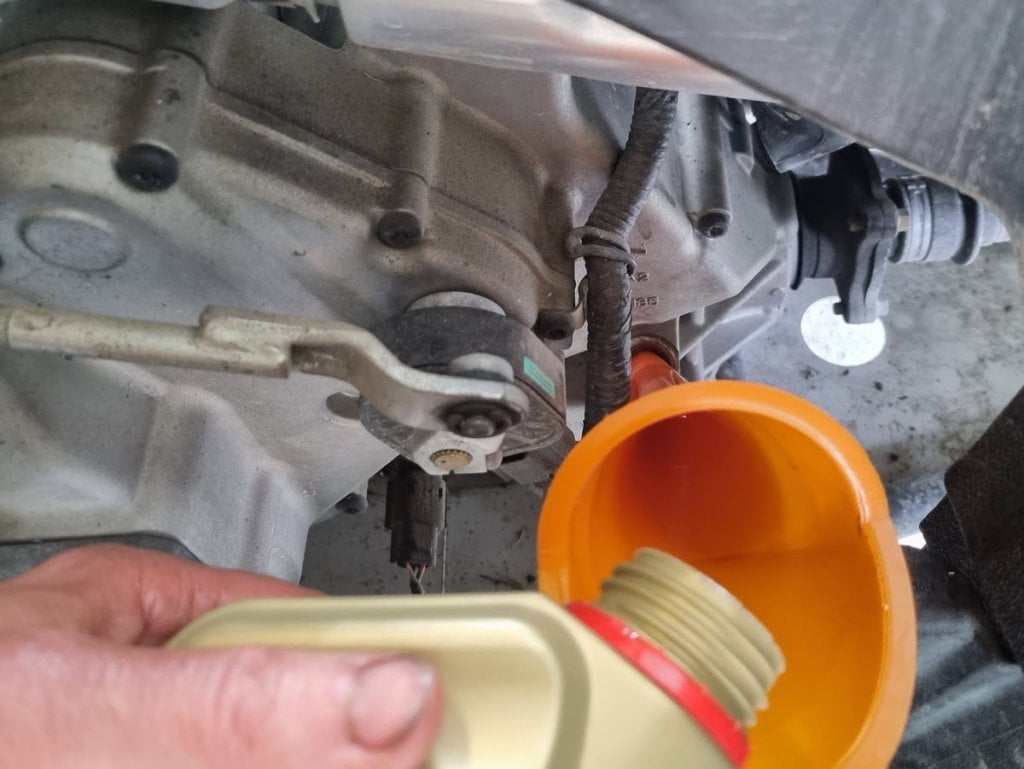
5. Remove the Fill Plug and Add Oil
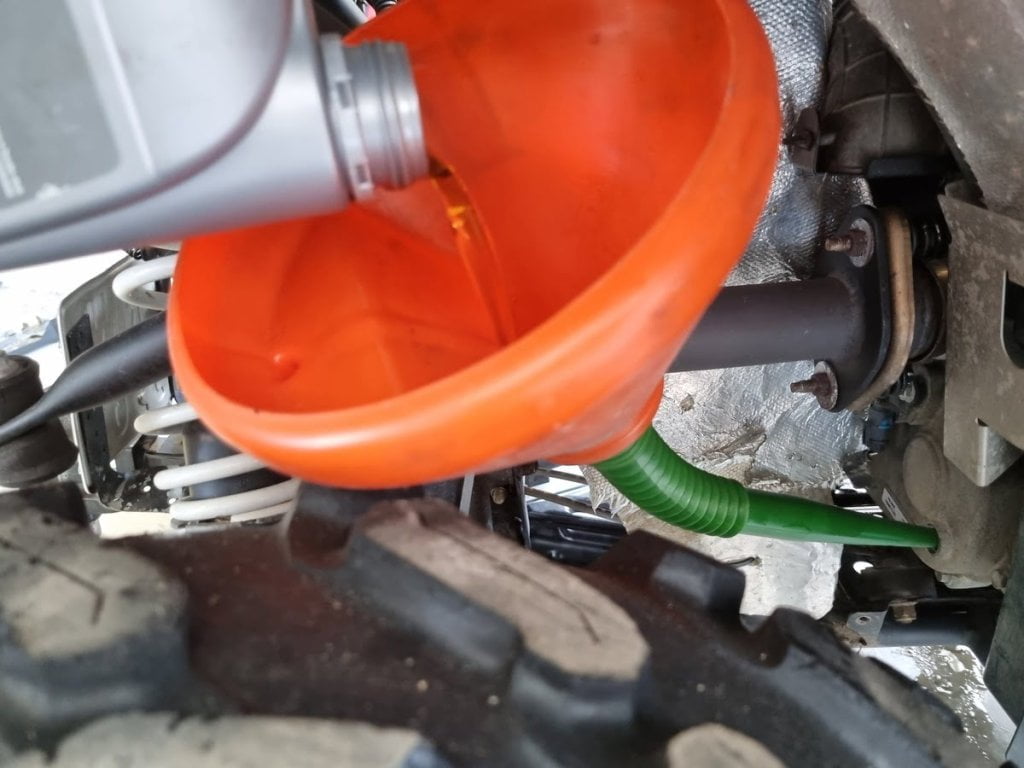
The fill plug is located slightly higher than the drain plug. Remove it and use a funnel with a hose to add the recommended specification new oil.
Add oil until it comes out back through the fill hole. Wait a few seconds and add another dash of oil to ensure you’ve reached the correct level.
6. Reinstall the Fill Plug
Torque to specification, usually 15 to 20 Nm, but always refer to the owner’s manual.
Check for leaks before reinstalling any covers or panels you removed to access the transmission case.
How to Change Front or Rear ATV Gearcase Oil
The procedure for changing gearcase (differential) oil is similar to changing the transmission oil.
Some ATVs have one drain plug, one fill plug, and one level plug. On others, you fill new oil through the level plug.

Note that some ATVs with ADC (Active Decent Control), like some Polaris ATVs, require a particular type of fluid, not regular gearcase oil.
- Position the ATV on a level surface.
- Remove the fill plug.
- Place a drain pan under the gearcase unit.
- Remove the drain plug and allow all the oil to drain completely.
- Clean and reinstall the drain plug—torque to specification.
- Add the proper amount of recommended oil or fluid through the fill plug using a funnel with a hose.
- Reinstall the fill plug – torque to specification.
- Check for leaks.
- Dispose of the used oil or fluid properly.
FAQ
How Often Should I Change the Oil in My ATV?
The first oil change on most ATVs is after the engine break-in period of about one month’s use or 25 hours of run time, whichever comes first. Then, it is recommended to change the oil and filter every 100 hours, 1000 miles, or six months, whichever comes first.
If you submerged your ATV in mud or water, the oil must be changed immediately. This guide tells you all the other steps to repair an ATV that’s been submerged.
How Much Does It Cost to Change ATV Oil?
An ATV oil change will cost $40 to $70 in total. New oil, filter, and labor included. If you do the job yourself, you will only need to pay for the oil and filter, typically $25 to 45$.
What Type of Oil Should I Use for My ATV?
This is how to choose what oil to use on your ATV.
Can I Use Car Oil for My ATV?
You should not use regular car oil on your ATV. Check out this article to learn why.