You turn the key or activate the starter button on your ATV, but nothing happens. No lights, no power to the display, or no power at the ignition. What do you do, and what may be wrong?
Here are the most common causes to look into when your ATV is not getting any power:
1. The Kill Switch Is in the “OFF” Position
Always begin by eliminating the quick and easy stuff first.
When the kill switch is in the “stop” position, it cuts all electric power to most systems on the ATV.
Many don’t use their kill switch that often and usually leave it in the “run” position. Therefore we tend to forget to check the kill switch’s position when facing issues such as loss of power.
It is easy to accidentally bump over the switch or forget that it was activated the last time you stopped the ATV.
If you’re lucky, setting the kill switch to “run” is all it takes to fix your issue.
2. The Kill Switch Is Corroded or Full of Dirt
Another possible issue with the kill switch is internal corrosion due to water getting inside.
Dirty water in reaction with air will cause green oxide to form on the switch’s metal components. Suck corrosion will prevent a proper connection.
If the stitch is not severely corroded, you may get it working again by flushing it with some anti-corrosive like WD-40 or an electric cleaner. Turn the switch on and off repeatedly until it hopefully starts working again.
For a longer-lasting repair, you must disassemble the switch, clean the insides properly, and then pack it with dielectric grease. The grease will prevent future corrosion.
3. The Main Power Switch Is Turned Off
After making sure the kill switch is OK, it’s time to inspect the battery.
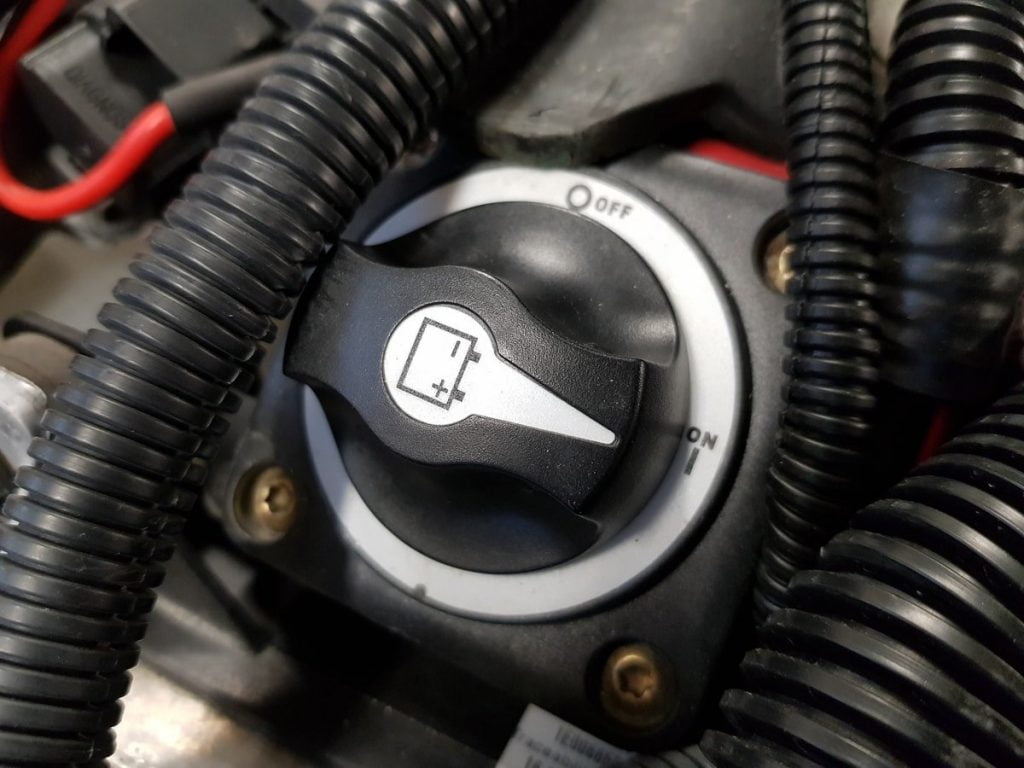
Some ATVs have a power cutoff switch near the battery that cuts all electricity.

Such a switch is beneficial when working on the electrical system, as it eliminates the need to disconnect the battery. It is also a quick precaution to prevent parasitic battery drain when you don’t use the ATV for extended periods. As with the kill switch, it is easy to forget that it is turned off.
4. Loose, Corroded, or Disconnected Battery Terminals
Battery connections may come loose, so make sure they are tight and not moving.
Over time corrosion may build up on the battery terminals and the connectors. If they seem corroded, disconnect the connectors from the battery terminals and clean them using a Scotch Brite pad and some baking soda dissolved in hot water. Wear eye protection and rubber gloves.
Many ATVs have more than one connector that goes to each battery terminal. When replacing or disconnecting the battery for some other reason, It is easy to forget to install one or more connectors.
Ensure all positive connectors (usually red wire) are connected to the positive battery terminal, and all negative connectors (usually black wire) are connected to the negative battery terminal.
Tip: Take a photo of the wiring before removing the battery. It will make it easier to connect the wires correctly.
5. Battery Not Charged or in Bad Condition
Many ATVs are used only sporadically, with more extended periods where the ATV is left standing. By leaving a relatively small battery like the one you find in an ATV unattended for more than a few weeks, you are asking for trouble.
Related: This post will tell you how to charge an ATV battery properly.
Use a multimeter to make sure the battery voltage is above 12.4V. Note that the battery may be defective even if you get a good voltage reading.
Related: Check this guide on how to test an ATV battery.
6. Blown Fuses
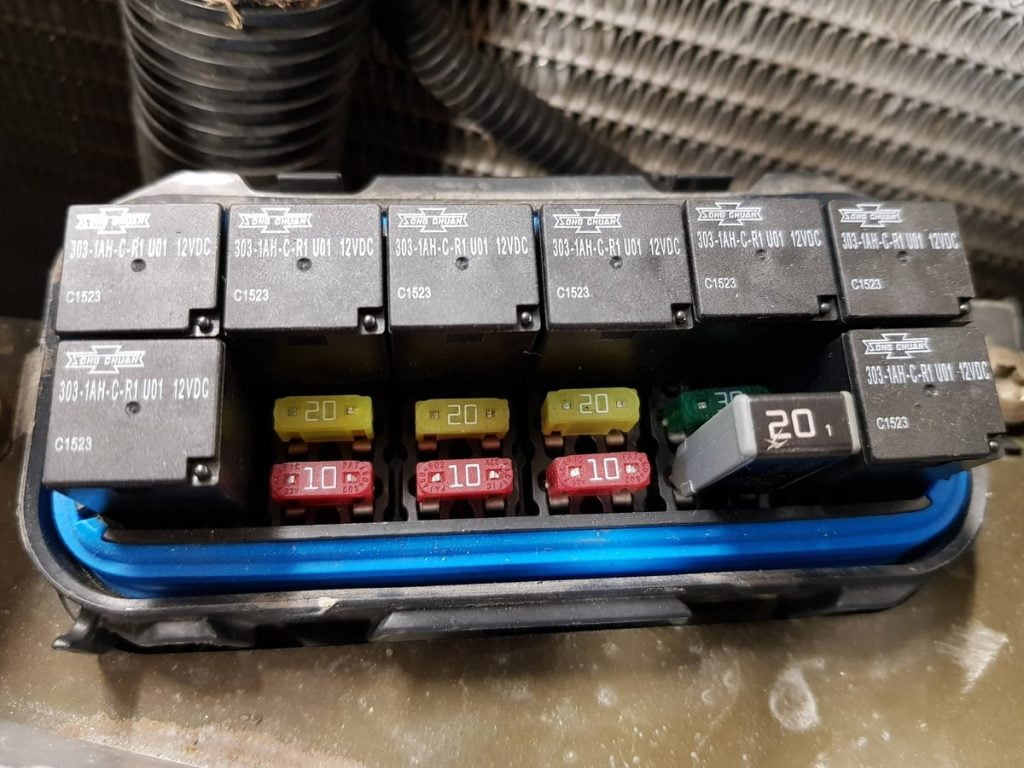
After ensuring the battery is in good shape, it is time to check all fuses.
Remember that your ATV likely has fuses in more than one place. You typically have one main fuse box and a large fuse near the solenoid or the starter relay (near the battery).

Please refer to your user’s manual for the location of the fuses on your ATV.
The easiest way to check if a fuse is blown is by using a multimeter to test for continuity.
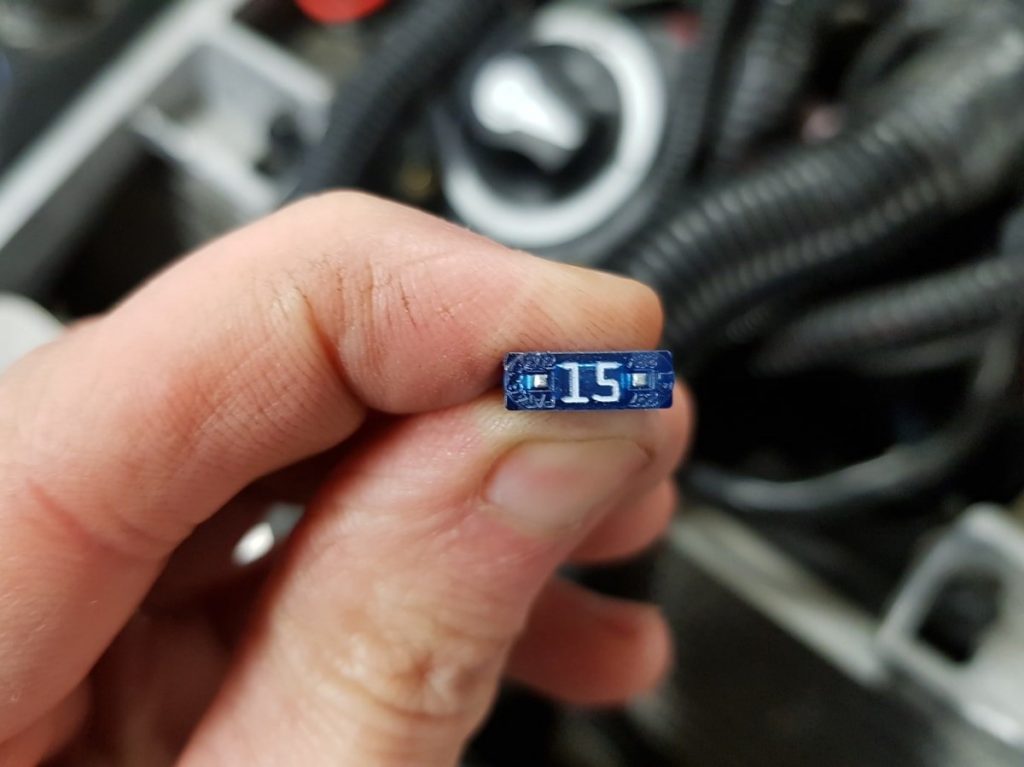
On the backside of each fuse are two exposed pieces of metal. These are there for quickly testing the fuse without removing it from the holder.

Set the multimeter to the “continuity” setting. The positive lead goes to one of the metal test points, and the negative lead to the other.
You know the fuse is OK if you get a beeping or buzzing sound from the meter. Check all fuses and replace those that do not pass the continuity test.
Note that a fuse may be blown even if the metal lead inside the fuse looks intact.
7. Loose or Corroded Ground Wires
You now know that the battery provides power and that all your fuses are good.
The next step is to ensure that no ground wires have come loose or are corroded. A defective ground wire will prevent proper electric function.
Start near the battery and trace all black cables to where it is connected to the frame or other solid metal parts of the ATV.
If you see any corrosion signs, it is good to disconnect the cable and clean both the connector and the mounting spot properly.
Tighten down all connectors so that they are mounted snugly.
8. A Damaged Cable Creates a Short Circuit
If you find blown fuses, replacing them is not always enough. You need to find the cause of your blown fuse as well.
The purpose of a fuse is to serve as the weakest link in the electric circuit. The fuse is designed to break if something is causing a higher current draw than the components and wires in the circuit were designed for.
Short circuits to ground or power are typical causes of blown fuses. A short circuit is when the current, for some reason, travels in an unwanted path.
If a live cable (typically red) gets damaged, exposing the conducting wires inside and touching an exposed metal part of the bike, you get a short to ground.
A short circuit can also happen between two cables. If a live cable and a ground cable are damaged in the same spot, you may get a short circuit to power.
Start near the battery and inspect the wiring harness to identify any damages. A cable’s insulating layer can get damaged by rubbing against a sharp object or from an impact.
Another typical scenario that leaves long-term stored ATVs vulnerable is shed-rodents. For some reason, mice who love nibbling on ATV cables seem to prefer red and yellow live wires.
Related: Where to Store Your ATV? 9 Best Ways
9. Faulty Rollover Shutdown Relay
Some ATVs have a relay that cuts all power to the rest of the ATV if it flips. It may be located near your battery, but refer to your ATV’s schematic to learn if your bike has one.
If this relay fails or has a bad connection, you won’t get any power to the bike, including the ignition.
10. A Corroded or Faulty Ignition Switch
The ignition switch cuts all power except for the always-live systems, like the starter solenoid. When it’s not working, you won’t see any sign of power either in the instrument panels or lights, and it won’t send a signal to the starter solenoid, telling it to activate.
Ignition switches are known to fail due to corrosion and from getting packed with dirt and debris.
Inspect the wires where they connect to the back of the ignition switch. Any sign of corrosion is an indication of internal corrosion as well. Blown fuses are another sign of a possible short inside the switch.
To test the switch, you can use a multimeter to check the hot wire (usually red) that goes into the switch. It should have constant power. The switched wire that comes out of the switch (typically black or brown) should have 12V only when the switch is turned on. If so, you know the switch is OK.
Short Term Fix
You can try cleaning the switch by flushing it with an electric cleaner or WD-40 as a quick fix. Use the supplied straw to spray generous amounts of cleaner through the keyhole hole.
Then activate the switch several times before blowing compressed air through the keyhole to remove the cleaner fluid and any debris.
If you get the switch to start working, you can spray some dielectric grease through the keyhole to protect the inside of the switch against further corrosion.
Long Term Fix
Remove the ignition switch to see if it can be disassembled for a more thorough internal cleansing. After cleaning, stuffing it with dielectric grease is good practice to prevent future problems.
Many types of ignition switches are not designed to be disassembled. If so, you must replace it with a new switch.
Related: How to Test, Clean, or Replace an ATV Ignition Switch
11. Corroded or Loose Starter Solenoid Connectors
Solenoid connections are known to corrode or come loose. Make sure all connections are snug and in good shape.
Solenoids are typically extra prone to corrosion from mud and water exposure. It’s not uncommon that they corrode so badly that pieces of the connectors break off, leaving them unable to deliver power to the starter.
While there, you should ensure the solenoid is getting power.
Possible Causes of Random Loss of Electric Power
In some cases, the ATV experiences intermittent power losses.
Maybe you were able to start and run the bike as usual, but then it suddenly dies for no apparent reason.
Other times you may not even be able to start the bike, but the instrument panel and fuel pumps turn on and off repeatedly.
Here are a couple of possible issues to look into when facing this type of behavior:
Faulty ECU/ECM Unit
The Engine Control Unit (ECU) or Engine Control Module (ECM) is an electric control unit that controls the engine’s various sensors, actuators, fuel injectors, ignition, and ancillaries.
If it fails, you may get symptoms such as random loss of power, almost as if a connection is loose. Your dealer may or may not be able to verify that you have a faulty unit.
A bad voltage regulator, causing a too high voltage to be run through the system, is a common cause of a faulty ECU/ECM. The ECU/ECM and voltage regulator are combined in one unit on most modern ATVs.
Test the voltage of the current exiting the module. You may need to replace the unit if the reading is too high (typically 14.4V).
The Auto Circuit Breaker Cut Off Too Soon
Some ATVs use auto circuit breakers that will cut off when the fuse gets too hot. When they cool down, the power will return.
The breaker’s bi-metallic strips can wear or develop a bad connection, making the breaker run hotter than it should. This will cut the power sooner than it should.
One option is to replace the breakers with new ones. An alternative method that some users report having success with is replacing the breakers with similar rating standard blade fuses.
When All Else Fails
If none of the suggested steps in this article helped you identify the issue, you might need to do a complete inspection of the electric system.
Begin your testing at the battery and trace every hot wire until you find where you don’t get a reading. It’s a tedious job, but hopefully, it will help you identify the root cause of your issues.
FAQ
Why is my ATV not getting electrical power?
This could be due to a dead battery, a blown fuse, faulty wiring, or problems with your ATV’s ignition system. It’s important to identify and rectify the issue promptly.
Why does my ATV lose power while riding?
Intermittent power loss can occur due to a failing battery, stator, rectifier/regulator, or a loose or corroded electrical connection. A detailed inspection might be required.
How can I restore power to my ATV?
Check the battery, fuses, and wiring for any visible issues. If the problem persists, professional help may be required to check the stator or ignition system.
Wrapping Up
Facing issues with your ATV’s electrical system can be daunting, but you can handle the situation well with the right knowledge. With regular maintenance and quick action when issues arise, you can ensure your ATV remains reliable and ready for adventure. However, don’t hesitate to seek professional help if the problem persists or is beyond your abilities. Safe riding!
