If your ATV leaks gas, you must identify and fix the issue before you continue riding. Not only do you pollute the woods by ignoring the leak, but you also waste money by spilling precious gas. Gas leaks are also associated with a potential fire hazard.
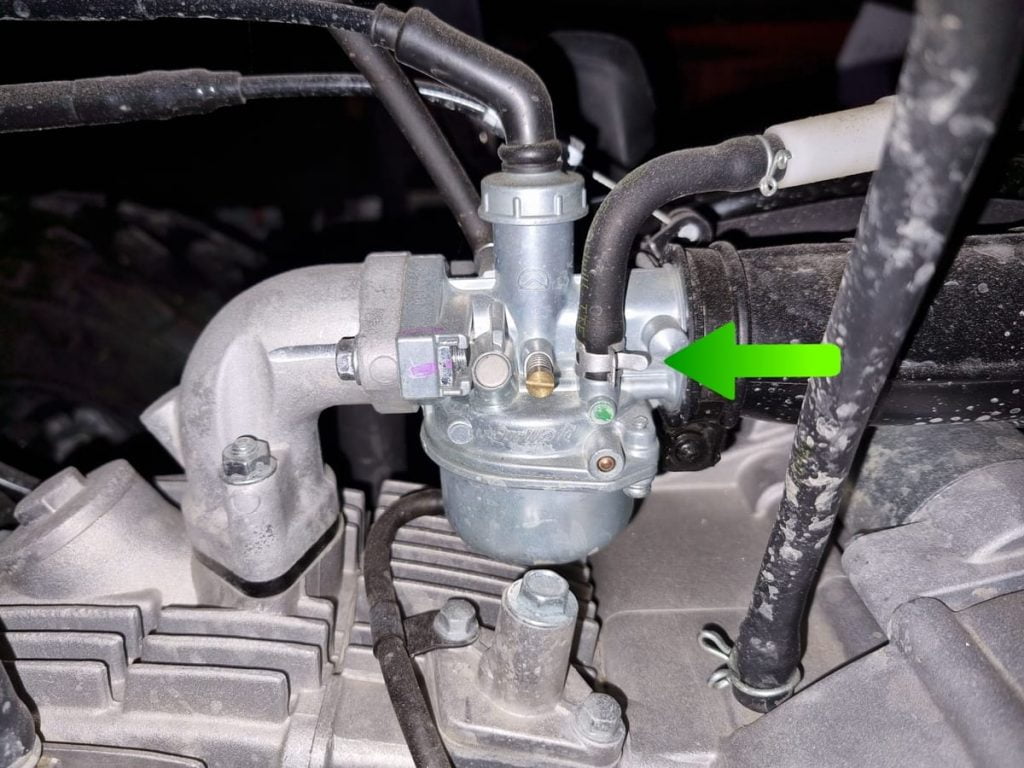
Usually, when an ATV is leaking gas, the fuel comes from the carburetor or its vent tubes. Other times, the fuel shutoff valve (also known as the petcock valve) breaks, or a fuel line may crack due to old age. These types of leaks are usually easier to identify and repair.
When a carburetor is leaking gas, quite a few possible issues could be causing the problem:
- A blocked gas cap is causing pressure buildup
- The carburetor float is stuck open
- The carburetor float is leaking
- The needle valve is not seating properly
- The needle valve brass fitting o-ring seal needs to be replaced
- The float height is incorrect
Several of these issues display identical symptoms, such as gas seeping out of the carburetor overflow tube. Further investigation is required to identify the culprit of your problem.
How to Locate the Gas Leak
Note: This guide is designed for home mechanics who enjoy repairing their vehicles and machinery. It’s important to note that some steps involve disassembling the carburetor. If you’re unfamiliar with how a carburetor looks or functions, it might be wise to leave these particular steps to a professional or someone with more experience in this area.
Often, the location of a leak isn’t immediately apparent, although there are times when it can be pretty obvious.
Begin your search at the bottom of the gas tank. If your bike has a fuel shutoff valve (not all ATVs have one), and it’s wet, wipe it clean with a paper towel to see better where it leaks.
If the valve is dry, inspect the main feed and reserve fuel lines for splits or cracks. This may require removing a few plastic panels to gain proper access. If the fuel lines are dry, they aren’t the source of the leak.
Additionally, ensure all gas lines are correctly attached, fully seated onto the nipple, and secured with a hose clamp.

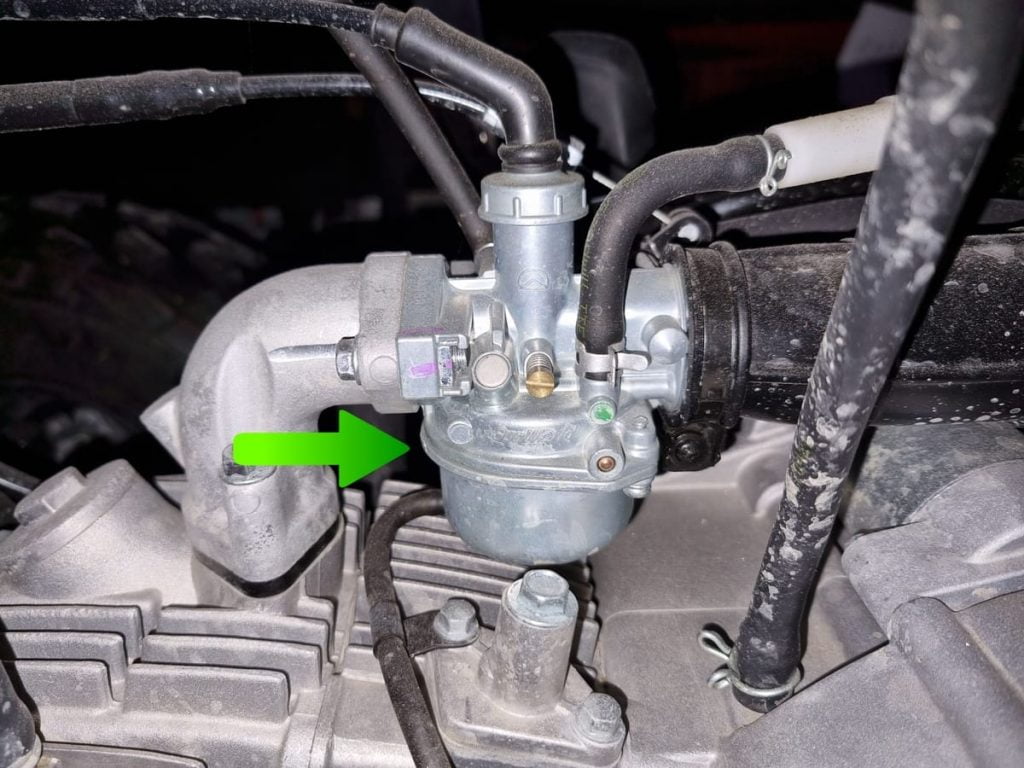
Next, examine the carburetor. If the bottom half, known as the carb bowl, is wet with gas, it likely indicates a bad seal. Before ordering a new seal, ensure the drain plug is tightened and seals correctly.
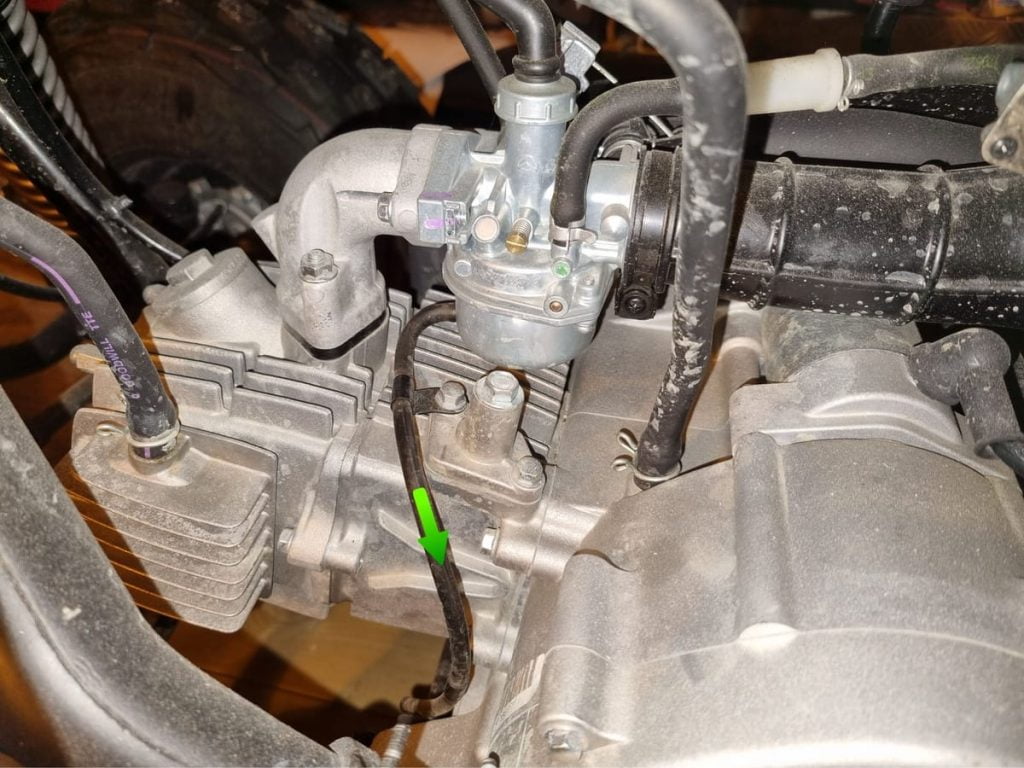
All carbs have a fuel overflow pipe to drain the fuel if it exceeds a certain level inside the carb. Many gas leaks are discovered when fuel begins seeping out of this drain pipe and onto the ground. If that’s the case, you need to do more troubleshooting to identify the root cause.
How to Stop Your ATV From Leaking Gas
After your initial inspection, you may already have identified where the leak is coming from, or you may need to continue your troubleshooting a bit further.
This guide includes steps that vary in complexity: some are quick and easy to complete, while others are more time-consuming, requiring patience and careful adjustment.
We will begin with the quick and easy steps to rule those out. Then, we’ll work our way through the most common issues in the order where they are most likely to occur.
When Fuel Lines or the Fuel Valve Leaks
If you have determined that the leak is due to a leaky valve or a split fuel line, the solution is straightforward: replace the damaged component with a new one.
Make sure you get the correct part for your bike. Your dealer should have these parts at hand. You can get fuel lines at most auto supply stores.
Before replacing the fuel valve or replacing fuel lines that do not have a shutoff valve, you need to drain the tank. Learn how in this post.
Did you know: Fuel lines break down over time and should typically be replaced every two years, according to many ATV service manuals?
When Gas Leaks From the Carburetor Overflow

If gas is leaking from the carburetor overflow tube, you’ll need to methodically work through a checklist of potential issues to identify and resolve the cause of this problem.
Make Sure the Fuel Tank Vent Works and is Not Blocked
All fuel tanks have an air vent that allows air to enter the tank as the fuel level drops. This ven also lets out air when the air inside the tank expands due to an increased temperature.
The venting mechanism is either integrated into the gas cap or built as a separate air vent with a hose from the top of the tank.
If the vent is blocked, air pressure will build up in the tank and force fuel into the carb until it starts seeping out the overflow tube.
To test if a blocked tank vent is causing the leak on your bike, remove the gas cap and let it sit for about 5 minutes.
If the leak stops, you’ve likely found the issue and need to investigate further what is causing the blockage. Often, the easiest fix is replacing the gas cap.
However, if the leak persists, you need to continue your troubleshooting a bit further.
Make Sure the Carburetor Float Is Not Stuck
Inside the carburetor, there is an air-filled float that, when working correctly, regulates fuel flow into the carb bowl.
When the fuel level inside the carb bowl drops, the float drops, releasing pressure on the needle valve (also known as the float valve), allowing more fuel into the carb bowl. The valve stays open until the float rises past a given level and closes the needle valve again.
If the float gets stuck with the fuel valve in an open position, fuel will continue to pour into the carb bowl until it reaches a level where it drains out the carb overflow pipe.
Here are a few things to try before disassembling the carb.
Clean the carb by adding carb cleaner to the fuel. Over time, the inside of a carb tends to gum up from old gas, especially if the ATV sits a lot between each time it’s used.
The most thorough solution is to disassemble the carburetor and clean it using a carb cleaner, a brush, and compressed air. However, this is a time-consuming process.
As a first step, I recommend trying a more straightforward method: Run a tank or two of fuel mixed with an additive like seafoam or a similar product. This can help dissolve deposits on the carburetor’s internal components, potentially freeing up the carb bowl to move smoothly again.
Related: How to Know if the Gas in Your ATV Is Bad or Not
Gently tap the carb bowl with the handle of a screwdriver. Sometimes, the float gets hung up on itself and only needs a gentle tap on the side of the carb bowl using a screwdriver’s rubber or plastic handle.
Do not hit too hard; the aluminum alloy used in the carb bowl cracks quite easily.
With youth ATVs, try bouncing one end of the ATV up and down to shake the float loose. Full-size ATVs are usually too heavy for this method to be effective.
Use compressed air to free up the carb float. Another trick worth trying before disassembling the carb is blowing compressed air through the carb bowl drain hole. This may be all the float needs to fall back in place.
- Close the petcock valve or clamp off the fuel line
- Unscrew the drain screw. The fuel left inside the carb bowl will drain out.
- Blow compressed air up into the drain hole. A few quick bursts of air should be enough.
- Reinstall the plug and open the fuel valve to see if this has fixed the leak.
Disassemble the Carb and Inspect the Internals
If the leak persists after trying the previous steps, the next course of action involves removing and disassembling the carburetor.
This will allow you to inspect and test the internal components, such as the Needle Valve, Needle Valve O-Ring, and Float. Common issues that may be causing the problem include:
- A dried-up Needle Valve O-Ring.
- The Needle Valve not sealing properly when closed.
- A cracked Float filled with fuel, preventing the needle valve from closing correctly.
This is how you do it:
- Set the fuel valve (if your bike has one) in the off position or clamp off the fuel line.
- Remove the air filter, air filter box, and any plastic covers that prevent access to the carburetor.
- On two-stroke ATVs with an auto-lube system: Remove the two-stroke injection pipe that brings two-stroke oil into the fuel mix. Note: This tube can be delicate, so be careful. Also, double-check that this tube is put back on before starting the ATV. A two-stroke engine will soon seize up if run without two-stroke oil mixed with the fuel.
- Undo the clamp holding the carb onto the rubber intake manifold.
- Pull the carb out of the intake manifold and bring it down. It’s usually a pretty tight fit.
- Disconnect the fuel pipes coming from the tank. Usually, there is the main feed plus a reserve pipe.
- Undo the screw that holds the choke in its position on the carb. Carefully remove the choke mechanism from the carb and put it out of the way. Make sure the assembly doesn’t fall apart.
- Undo the screw or screws that hold the throttle cable in its position on the carb. Carefully pull out the throttle slider. The slider has a groove; note which side it’s located (left or right). Put the assembly, including the needle, somewhere out of the way.
- The carburetor should now be loose for you to move it over to your workbench. Be careful if you use a vice to hold the carburetor in place, as the aluminum alloy cracks easily. Place the vice around the meatiest portion of the carb and only apply light pressure.
- Remove the float bowl, typically held in place with four screws. Be careful not to tear the gasket. The bowl should be squeaky clean inside.
With the float bowl off, it’s time to inspect and test the various components.
Make sure the float is not damaged.
Now is an excellent time to look for cracks in the float walls. If there is fuel inside the float, it needs to be replaced.
Make sure the float and needle valve move freely.
The bowl should pivot freely on the pin holding it in place, and the needle valve should slide up and down with no drag. If that’s not the case, you need to disassemble and clean or replace the affected components.
- The float is held in place with a tapered pin that goes in only one way. Use a hammer and a small punch and gently tap the smallest end of the pin. The two brackets holding the pin are incredibly delicate, so be careful. Some carbs use a spring clip to keep the float in place.
- Remove the needle valve from the brass housing.
- Use some carb cleaner, a nylon brush, and compressed air to clean everything. If the needle valve is gummed up, you are likely better off replacing it with a new one.
Test if the float valve and float valve o-ring seal properly.
When the float valve or its o-ring does not seal properly, fuel will continue to enter the carb bowl even when the valve is closed.
- With a clean float valve and the float in place, reconnect to the fuel line on the bike, or even better, use a spare fuel tank to test it on the bench.
- Turn the fuel valve on or release the clamped fuel line. Gas should now be dribbling down through the float valve.
- Use your finger to lift the float until the dribbling stops. If the dribbling continues even with the float and float valve in the fully closed position, you know the problem is not with the float height. You are left with two options: a float valve that does not seal properly or a leaking float valve o-ring.
- Remove the float and valve as described above.
- Inspect the chamfered end of the float valve. It’s usually rubberized and may become worn (visible grooves), or the rubber tip may harden. Replace the valve and its brass outer part if you see any wear. These two components come as a set and should be replaced altogether.
- To test the seal, connect the fuel line again and use your finger to cover the hole where the float valve usually sits.
- This should stop all fuel flow. If there still is a leak, you know that a bad o-ring causes it.
- To inspect the o-ring, remove the screw and plate that holds the brass outer part of the float valve in place. The O-ring is located between the brass fitting and the aluminum casting.
- Remove the brass fitting using needle-nose pliers.
- The o-ring needs to be flexible and should protrude slightly outside the diameter of the brass fitting to seal correctly. Over time, these o-rings tend to dry up, shrink or break.
- Use a pick to flick off the O-ring and replace it with a new one.
- O-rings come in various sizes, measured as ID (inner diameter) and cross-section. To find the correct size, use calipers to measure the diameter of the groove on the brass fitting where the ring sits. This will be your ID. Next, measure the outside diameter of the brass fitting. If the outside diameter is, let’s say, 2mm larger than the inner diameter, you need an o-ring with a cross-section greater than 1mm for it to seal. Sometimes, you won’t be able to fit an o-ring with the same ID as measured since the cross-section of this o-ring is too large. In that case, choose an o-ring with an ID one size smaller than the measured diameter of the groove. When installed, the o-ring will stretch, effectively reducing the cross-section of the rubber. Aim to find an o-ring that is just the right size to make a snug fit without forcing the sleeve in place. Use some silicone grease on the o-ring to aid installation.
- Test the seal once more to make sure the O-ring is sealing.
- Reassemble the float and float valve, and test as earlier. If the valve does not seal when you lift the float, you now know that the issue is with the float valve not sealing correctly.
- Before reinstalling the float bowl, ensure the gasket is in good condition and has no rips, tears, or missing pieces.
- Do not over-tighten the float bowl screws, as the aluminum casting bends easily.
- Reinstall the carburetor to the ATV. Connect the fuel lines, throttle cable, choke assembly, and two-stroke injection pipe.
- Open the fuel valve and look for leaks.
- Open the drain valve to ensure there is fuel in the carburetor before starting the engine.
Related: How to Clean an ATV Carburetor – All You Must Know
When the Carb Bowl Gasket Leaks

Between the carb bowl and carb housing, a seal prevents fuel from leaking through the joint. This gasket may dry up or go bad over time. The gaskets may also have gotten damaged from opening the carb bowl previously.
Replacing the casket requires removing and disassembling the carb, as described above. Your dealer should have new gaskets in stock that are usually affordable. Aftermarket options are available for most ATVs as well.
Be careful not to damage the cast aluminum when cramping off the old gasket, as this may prevent a proper seal.
When the Float Height Is Set Incorrectly
If all else fails, make sure the float height is set correctly. While checking the float height is relatively straightforward, it’s unlikely to be the cause of your leak unless someone has been meddling with the carburetor previously.
The float height determines the fuel level at which the needle valve closes. If set incorrectly, the valve may not close until fuel begins pouring out the overflow.
How to measure the carburetor float height:
- Open the Drain Valve: Locate the drain valve where the drain pipe exits the float bowl.
- Position the Rubber Pipe: Bend the rubber pipe and position it against the side of the float bowl.
- Measure the Float Height:
- Find the top of the float bowl flange.
- Observe the fuel level visible in the see-through drain pipe.
- Measure the distance from the top of the float bowl flange to the fuel level in the pipe.
Please refer to your user manual to find the correct float height for your ATV and how to adjust it if necessary.
Also, note that the float bowl should be as level as possible. If the carb is installed at an angle, fuel may spill out the carb overflow pipe.
Related: ATV Maintenance 101: Carburetor Adjustment Made Easy
Wrapping Up
To effectively address a gas leak in your ATV, start with basic checks like inspecting fuel lines and valves, and if necessary, advance to inspecting the carburetor.
Tackling these issues promptly is crucial for safety, environmental protection, and fuel economy. For complex repairs, consider consulting a professional.
