
Leaks along the tire bead are common in ATV tires that regularly run on mud, sand, and rough, rocky surfaces. This type of leak is typically relatively small, allowing air to seep overnight or over a few days.
To fix a leak at the tire bead on an ATV tire, you have several options:
- Remove the tire from the rim and clean up or repair the bead area of the rim.
- Apply bead sealer if the rim is too damaged to seal appropriately.
- Install an inner tube.
- Inject a tire sealant into the tire.
Each of these methods has its pros and cons to consider. Depending on your specific situation and the cause of the leak, one approach may be more suitable than the others. We’ll cover each of them in detail in this article.
What Causes a Tire Bead Leak?
Bead leaks happen when the tire does not seal properly against the rim’s bead in a tubeless wheel. The bead area of the rim must be clean and undamaged for the rubber to make a tight seal against the rim.
Typical causes of bead leaks on an ATV tire:
- Dirt and debris are trapped between the rim and the tire.
- Corrosion on the rims bead area. This applies to both steel and aluminum rims.
- Dent or crack in the rim.
Fix the Leak by Cleaning or Repairing the Rim Bead Area
Disassembling the tire from the wheel and addressing the issue causing the leak should be your primary alternative if you have the required time and tools. When performed correctly, this method will provide a permanent repair without any cons associated with the other alternatives.
Pros:
- This method permanently repairs the leak without impacting the performance of the wheel.
- The procedure is relatively cheap, at least if you already have access to the tools required.
Cons:
- It is more time-consuming than adding a tire sealant.
- Require some tools.
- It is not suited for repairs on the trail.
Tools You Will Need
- Tire jack and tire wrench
- Air compressor with an air chuck and an air nozzle
- Tire pressure gauge
- A screwdriver or a pick
- Tire marker
- Valve stem removal tool or air down tool.
- A spray bottle with soapy water (dish soap)
1. Remove the Tire and Place It Laying Down Flat

- Park your ATV on a solid, level surface like a garage floor.
- Place the tire jack on a flat, sturdy portion of the ATV’s frame and lift until the tire is off the ground.
- Use a tire wrench or any suitable tool to remove the lug nuts or bolts.
- Place the tire flat down to make it easier to identify the leak.
2. Identify the Location of the Leak
You may or may not already know where the tire is leaking. Even if you suspect the leak is near the bead, it’s a good idea to verify precisely where the leak is located and ensure there are no additional leaks before moving on.
- Fill up the tire with air to the specified tire pressure. Please refer to your user manual if you are unsure what tire pressure to use.
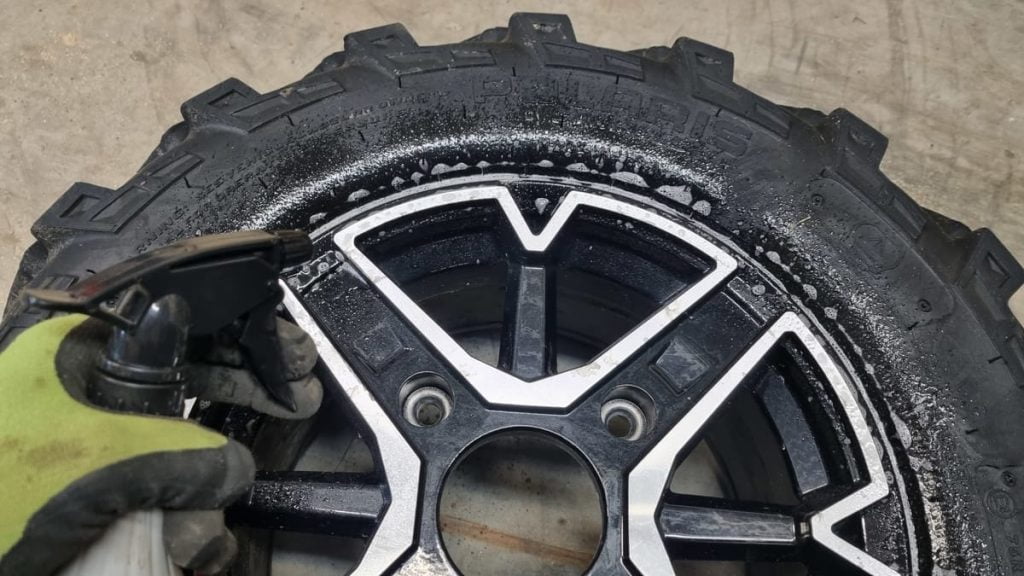
- If you have bead lock wheels, spray soapy water on the entire bead, the valve stem and valve core, and the locking bolts.
- Tiny air bubbles will start to appear where the air is escaping from the tire.
- If no new bubbles appear, flip the tire and check if the leak is on the other side.
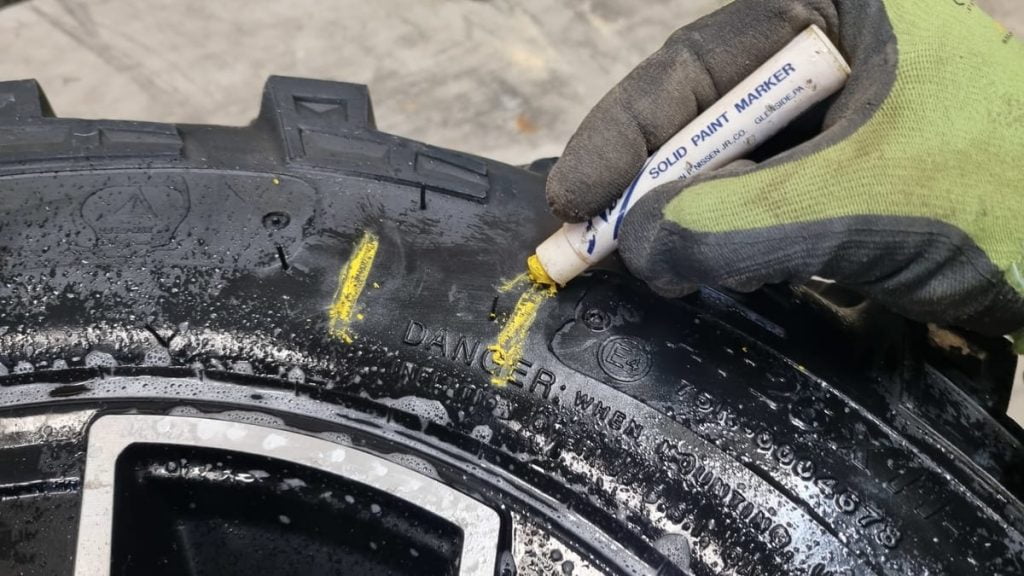
- Mark any leaks with a tire marker for future reference.
3. Air Down the Tire

Use a valve stem removal tool to remove the valve stem. This will completely deflate the tire in just a few seconds. Alternatively, you can use an air-down tool to remove all the air. However, this method is more time-consuming than removing the valve stem core from the tire valve.
4. Break the Tire Bead
Depending on what is causing the leak, you may or may not have to break the bead to address the issue adequately.
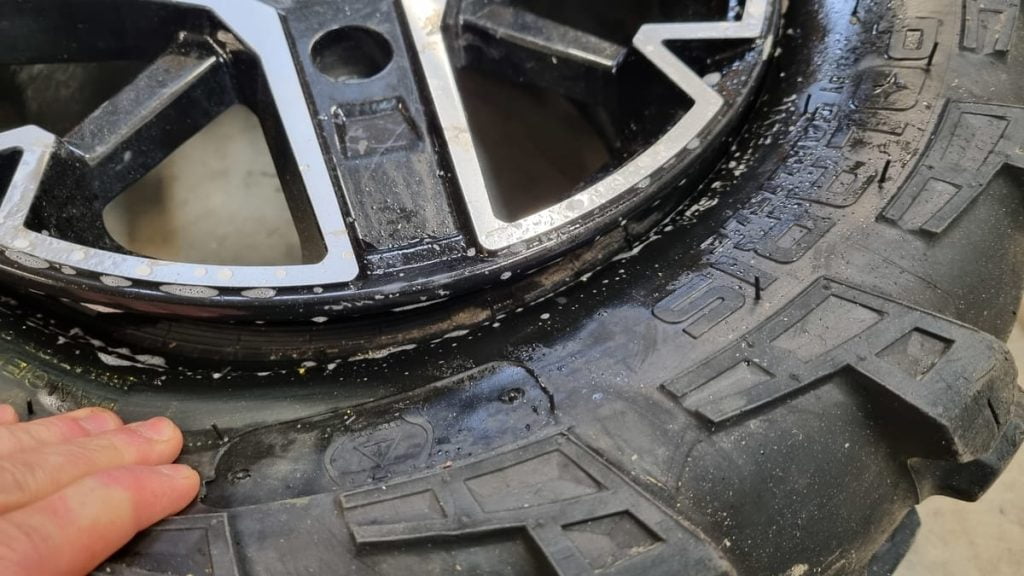
If the leak is caused by dirt caked between the rim and tire, but the rim is otherwise undamaged, you may get away with pulling back the tire slightly for cleaning. You can do this by applying weight to the tire’s sidewall until there is a small gap between the rim and the tire.
Cleaning without breaking the bead is easier on larger tires such as car or tractor tires. On smaller ATV tires, it’s less fiddly if you manage to break the bead completely. The result should be better as well.
If the rim is corroded or damaged, you are better off removing the tire from the rim entirely for proper access to the affected area.
There are several ways to break the bead of a tire at home. My personal favorite is using a portable tire changer tool. These are readily available, relatively cheap, and work well on most ATV tires.
I recommend bolting the tool to the floor if possible. I installed threaded concrete bolt anchors to remove the device when not in use. A bolted-down tool ensures more control of the process and better leverage.
Tip: To boost the success rate and reduce the risk of tire sidewall damage when using this type of tool, leave a tiny amount of air still in the tire before you break the bead. This will prevent the tire sidewall from giving in, causing the tool to slide out of position as you apply pressure.
For a cost-effective solution, consider creating a DIY bead breaker like the one I made before purchasing a specialized tool.

Check this post for a few other ways to break the bead on an ATV tire.
This is how you break the bead:

- Place the tire on the bead-breaking tool of your choice.
- Apply soapy water around the edge of the rim. This will make it easier for the tire to slide over the bead.
- Place the bead breaker against the edge of the rim.
- Gradually apply downward pressure to force the tire away from the rim. You should feel it when the tire pops over the bead. When the rim and tire are about two inches apart, you know that the bead has been broken. Ensure the tool stays in place throughout the process and does not slide down the tire sidewall.
- Rotate the tire and continue the process until the bead is completely broken.
5. Clean or Repair the Bead Area of the Rim
After breaking the bead, you need to determine what issue is causing the leak. Use a flashlight for a good view. Look for dirt, corrosion, or rim damage. Sometimes, you may even find more than one issue that needs to be addressed.
Continue as described below according to your observations.
When the Leak Is Caused by Dirt
When you ride in the dirt, mud, or sand, small particles and debris may work their way between the rim and tire. As more dirt builds up, it creates space for even more dirt until it eventually breaks the seal and causes a leak.
- Use a nylon brush or toothbrush to break up the dirt built up on the flange of the rim.

- Use compressed air and an air nozzle to remove the dirt as it breaks free.
- If scraping is required, use a tool made from a material that won’t damage the rim or paint. A stick of wood or a piece of hard plastic should do the trick. While damaged paint on the inside of the rim won’t be visible, it may lead to corrosion, causing new leaks down the line.
- After removing most of the dirt, use a wet rag to wipe off the remaining dirt. Use soapy water to wet down the rag.

- Use some WD40 on a rag to break up any oil or greasy spots. Please refrain from using potent solvents such as brake cleaner or paint thinner as they may damage the paint.

- Also, wipe the edge of the tire completely clean.
- Now that the rim and tire are completely clean, you can install the tire back onto the rim.
- If you notice any damages or corrosion after cleaning, you must address this before installing the tire.
When the Leak Is Caused by Rust or Flaky Paint
Both steel and aluminum rims may rust or corrode, but steel rims are particularly prone to leaks caused by rust.
Dirt and sand trapped between the rim and tire may wear down the paint over time, eventually causing the exposed metal to rust. Metals expand when they rust, creating gaps and an uneven surface that lets out air.
To fix a corroded rim, you must remove the corrosion and apply a coating to prevent further corrosion.
- Sandpaper: Begin sanding with a grit no coarser than 120 to remove most of the rust. Gradually progress to finer grits, such as 400 or even 800, for a smoother surface. Using overly coarse sandpaper can lead to scratches, which would need extensive work to smooth out.
- Wire brush: Alternatively to sandpaper, you could use a wired brush attached to an angle grinder. Begin with a medium brush and move on to a softer brush after removing most rust. Consider using some fine sandpaper to finish off for a smooth surface.
- Use a rag with some solvent or alcohol to clean off dust and any fats in preparation for painting. Allow to dry completely.
- Spray-paint the bare metal with several coats of suitable paint. Most hardware or automotive stores offer scratch-resistant wheel pain, ensuring a long-lasting result.
- Allow the paint to cure overnight before installing the tire onto the rim.

Consider sandblasting and powder coating the rim for a better and more professional result. I won’t detail how to do this in this post as it requires tools that typically only enthusiasts or professionals have access to.
The same method applies if the paint on your rim is flaky and starts to come off. Sand down all of the affected areas and apply fresh paint.
When the Leak is Caused by a Damaged Rim
If you hit a rock too hard or scrape the side of your rim against a hard surface, the rim may become damaged, preventing a tight seal.
You can repair minor nicks and dents by removing the tire from the rim and smoothing the damaged part with a Dremel tool or fine-grit sandpaper.
Larger dents or cracks that may affect the rim’s structural integrity should only be addressed by a professional. Visible cracks left unattended may expand gradually until complete failure down the line. While tire sealant or installing an inner tube may keep a cracked rim airtight, it should only be considered a temporary fix.
6. Seat the Bead
Before you seat the tire back onto the rim, please take note of the maximum air pressure the tire can safely handle. Never, under any circumstances, exceed the specified max air pressure.
- Spray some soapy water on the bead area around the entire circumstance of the wheel.
- Plate a ratchet strap around the wheel, as shown below. This will help push the wheel out against the rim so that it seals. Make sure the tire makes good contact with the rim.

- With the valve-stem core removed, add air until the bead pops in place, usually around 15 PSI. Caution: Never exceed the maximum tire pressure, which may cause a fatal explosion. Stop, deflate, add more lube, realign, and try again until you succeed.

- Stop applying more air as soon you hear the tire popping in place.
- Deflate the tire.
- Remove the ratchet strap.
- Install the valve stem core.
- Inflate the tire to the specified operating pressure before installing it back onto the ATV.
Fix the Leak Using Bead Sealer
Bead sealer is specially designed to seal troublesome bead leaks that otherwise are hard to repair. It also helps prevent leaks, making it a good option for those who regularly find themselves with bead leaks.
Pros:
- Help seal even badly corroded rims or rims with many minor nicks.
- Increases your chance of succeeding on the first try.
- Sealing the bead area helps prevent new leaks, preventing dirt between the rim and tire.
Cons:
- It does require curing before the wheel can be put back into use.
- Next time you need to remove the tire from the rim, breaking the bead may be more challenging. You must also scrape off the old bead sealer to clean the rim.
Bead sealer is applied as a thin coat to the inside of the rim where it touches the tire. Follow the supplied instructions carefully for a good result.
Another option if you don’t have access to bead sealer is a quality silicone sealant applied the same way as the bead sealer.
Do not inflate the tire before the bead sealer or silicone has completely set, as it will force out the sealant.
Fix the Leak Using a Tire Sealant (Tire Slime etc.)
When you’re out on the trail and don’t have the tools or time to fix the leak properly, or if you’re looking for a quick fix, consider using a tire sealant such as Green Slime.
Pros
- Fast.
- It does not require any tools.
- Trail friendly.
- It will fix most small leaks around the bead.
Cons
- It does not address the root cause of the leak, which may lead to new leaks down the line.
- It leaves a mess inside the tire that needs to be cleaned next time it is removed from the rim.
Fix the Leak by Installing an Inner Tube
Another option to fix a stubborn leak is installing inner tubes in a tubeless tire. However, tubes in low-pressure off-road tires are not always the best option.
Pros
- Installing a tube will fix any leak.
Cons
- Due to the low air pressure, the tube may spin on the rim, causing valve stem breakage.
- Tube valve stems are typically longer and more exposed when riding off-road.
- It’s not as easy to fix out on the trail.
- Cost.
Check out this post to learn more about the pros and cons of installing tubes in ATV tires.
How to Prevent Bead Leaks on ATV Tires
Sadly, there is no way to prevent bead leaks altogether. But, applying one or more of the actions below will significantly reduce the risk of it happening.
Break the Bead and Clean Regularly
If you know that you ride in a way that dirt will build up and eventually get a leak, it is better to clean when you have tools and time. Implement cleaning the bead into your maintenance.
How often you should do this procedure depends on how much and under what conditions you ride, but once a year could be a good starting point.
Apply Bead Sealer
Bead sealer not only helps seal current leaks but also helps prevent new leaks down the line. The sealer keeps the gap between the rim and tire shut so that dirt cannot begin to build up.
Install Inner Tubes
Inner tubes not only fix current leaks but will also help prevent upcoming leaks from causing any issues.