
Most winch owners will eventually find their winch cable stuck or jammed up. You set the winch to free spool, but the cable won’t pull out, no matter how hard you try.
The tips we share in this post usually help untangle or free up jammed cables. But sometimes, the cables can get so tangled up that you might need to take apart the winch or even cut the cable to untangle them.
These tips will work on all-terrain vehicles (ATVs), utility terrain vehicles (UTVs), and off-road trucks.
Which Method to Use Depends on the Type of Jam
The best method to untangle your jammed-up winch cable depends on the jam’s type and severity.
Winch cables get stuck for a wide range of reasons. Here are the most common ones, with guidelines on which method to use.
Begin with the first recommended method, as it will be the fastest and less likely to cause damage. Then move your way through the other methods until you succeed.
A Few Words of Caution
- Always wear leather gloves when handling steel winch cables. Cable strands break as a cable wears and will tear into your skin when handling the cable.
- Never grab the cable closer to the winch than one foot. If you or someone else accidentally press the wrong button, you need time to react so your hand isn’t pulled into the winch.
- Refer to the winch user manual for additional safety tips.
When The Cable Is Stuck or Pinched Between Windings
It’s a widespread scenario that many winch owners run into: You put the winch to free-spool, but the cable is stuck and won’t come out.
Most of the time, a cable is stuck because it is pinched between the cable windings. This happens when you put a lot of force on a cable that previously was only loosely spooled back onto the drum.
These cable jams are usually not that bad and can be fixed relatively fast with minimal risk of damaging the cable or the winch itself.
Recommended Methods: Work your way through methods one to three below.
Uneven Cable Winding Due to Angled Winching
For the cable or rope to fit onto the winch drum, it must be spread out evenly across the width of the drum. Sometimes, however, the situation requires that you winch at an angle. If you are not careful, you overfill the winch drum on one side.
Recommended Methods: Begin with method six below before working your way through methods one to five.
Untensioned Coils Unravel, Causing a ‘Bird’s Nest’ Tangle
The winch cable needs to be under constant tension, whether you are winching in or unspooling.
If you, for some reason, get a little slack in the cable, the tightly spun windings may come undone. One coil ends up over the top of another, and you have a bird’s nest of a mess before you know it.
The only way to fix this is by unspooling until you get past the problematic area and spooling back in neatly.
Recommended Methods: Gently try methods one to three, as outlined below. If this does not help, move over to method four or five.
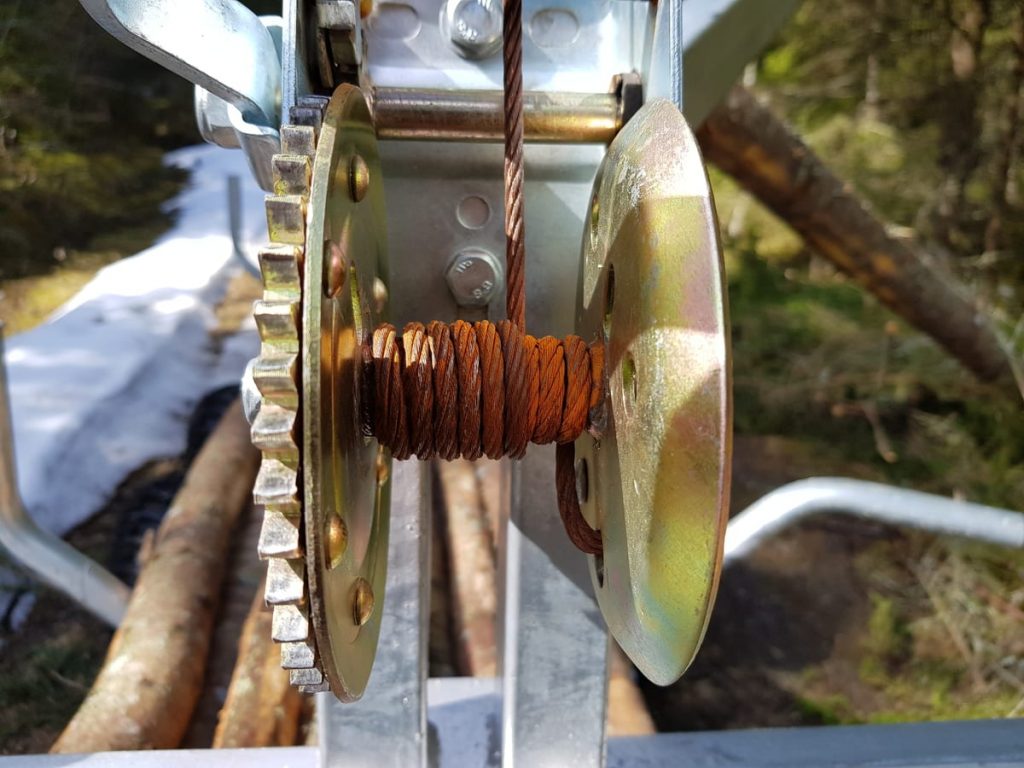
The Cable Has Rusted After Sitting and Won’t Unspool
Steel winch cables are lightly oiled when they are new to prevent rusting. This light coat of oil wears off after only a couple of times of use.
If you leave a wet steel cable sitting for more extended periods, it will rust, making it hard or impossible to unspool.
Recommended Method: Generously spray the drum of rusted cable with PB-blaster or a similar product, and let it sit a little to allow the product to begin loosening up the rust. Then move through methods one to three until the cable frees up.
How to Untangle a Stuck Winch Cable
Let’s dive into the various methods to free up and untangle a stuck winch cable.
1. Unspool the Cable While Applying Tension by Hand
- Unspool the winch until it’s at the spot where the cable binds. You will know when to stop by noticing when the cable does not unspool any further. Because of the bind, it will pull the cable back in regardless of how you turn the drum.
- Grab the free end of the cable with one hand, at least one foot away from the fairlead. Use your body weight to create leverage and pull straight down.

- While maintaining a constant downward pull on the cable, briefly press the “Out” button on your winch. This should free up the cable.
- You may need to spool the winch in and out several times to free up the cable. Continue spooling in and out just a few inches around the binding spot while applying constant tension to the cable.
- This method works best if you have a remote or helper to activate the winch. Make sure the helper knows how to operate a winch. Be careful not to press “In,” as your hand may get caught in the rollers if you don’t pay attention.
2. Use the Vehicle to Pull Out the Cable
This method involves setting the winch to free spool, attaching the cable to a stationary object, and reversing the vehicle to add tension.
- Park the vehicle with the front facing a stationary object, such as a large tree, a telephone pole, or the rear hitch of a truck or ATV.
- Set the winch to free spool. Make sure the spool spins freely. If it doesn’t, the problem is likely not a jammed cable but an issue with the free spool knob or the winch’s internals.
- Attach the free end of the cable to the solid object at ground level. You can use a strap to extend the winch cable if the free end is too short.
- With the winch in free spool, gently back up the vehicle until the line is under tension. Ensure you are not pulling the cable over a sharp edge, which may damage the cable.
- Gradually apply throttle to add more tension to the cable until it releases. Do not use excessive tension or speed, as this may break the drum.
3. Unspool Under Tension
This method is as far as you should go without disassembling the winch. As with method 2, you must attach the cable to a stationary object.
But instead of setting the winch to free spool, you will be spooling out the winch while gently backing up the vehicle to apply tension to the cable.
Do not use speed or yank hard on the cable, as this may ruin the gears inside your winch. Winches are designed to pull, but not to be pulled on!
4. Disassemble the Winch and Untangle the Cable
Bad jams or messy bird’s nests are not always salvageable without disassembling the winch. Getting a winch apart is not hard, but you must pay close attention to how things go together. You wouldn’t want to end up with a table full of parts you’re unsure how to reassemble.
Tip: Take photos as you disassemble to help you if you forget what goes where.
- Remove the winch from the vehicle.
- Disconnect the positive and negative cables.
- Wrap some electrical tape around the positive cable to prevent shorts.
- Remove the fairlead
- Unbolt the four bolts that are holding the winch in place.
- On some trucks or ATVs, you may need to remove the bumper or panels to gain access.
- Take the winch over to your workbench.
- The winch is held together by two or four hex bolt rods. Remove all four bolts.
- Now you should be able to wiggle the winch apart so that the winch drum comes loose.
- Start working the end of the cable free. Continue until you have untangled every knot and unspooled the cable from the drum.
- You may have to use a pair of vise grips and a screwdriver. Be careful not to damage the winch drum or cable.
- With the cable off the drum, reassemble the winch and install it back onto the vehicle.
- Spool the cable back onto the winch neatly and under tension.
5. Disassemble the Winch and Cut the Cable
If none of the above methods helped to free up the winch cable, you might need to cut it to get it off the drum.
If the tangle has left a bunch of bends and kinks in the cable, it should be replaced anyway. A steel cable that gets kink weakens where the bend was. It also gets curly, making it harder to spool back to the drum nicely.
- Follow the steps from method 4 to remove the winch from the vehicle. Cutting the cable with the winch on your workbench is much easier.
- Use a pair of vise grips and a screwdriver and work the cable around until you have a loop of cable to cut. Again, be careful not to bend or otherwise damage the winch drum, or you will be replacing that too.
- Use a pair of heavy-duty bolt cutters to cut the looped cable.
- If you cannot cut the cable, try using a small torch to heat it where the cut will be. Red hot metal cuts much easier than when cold. Ensure you do not direct the torch to the drum or winch, as it may weaken the metal or burn off paint.
- You can use a Dremel tool with a cutoff wheel as an alternative to bolt cutters. Wear protective glasses as these discs tend to break and shoot splinters out in any direction.
- Continue creating loops and cutting until you can remove short pieces of cable.
- This whole procedure does take some patience. Expect to use 1 – 2 hours or more.
6. Fix a Winch That is Overfilled With Cable
A winch overfilled with cable on one side from winching at an angle is easier to free up if you lubricate it with oil before trying the above methods.
Use a good lubricating oil free from acids and corrosive substances. Remove any excess oil, as oil retains dirt, which will wear the winch and cable prematurely.
How to Prevent a Stuck Winch Cable?
Regular cleaning, lubrication, and proper winding techniques can prevent your winch cable from getting stuck. The key is all in the preparation. Here are a few essential tips to avoid cable chaos in the future:
Ensure the Cable or Rope Is Wrapped Under Load
Both steel cables and synthetic ropes must be wrapped to the winch drum under load in a neat and even pattern. Winding the cable too loose will allow it to move around and cross over on itself.
This will cause it to bind up when you add tension. The goal is to ensure the lower cable windings are wrapped tight so that the cable’s free end does not slip between them when you add tension.
A tight and smooth wrap is essential with synthetic ropes. A synthetic is less likely to jam as long as it is spooled correctly. If not appropriately wrapped, a synthetic rope is, in fact, more likely to get stuck than a steel cable.
Head over to this step-by-step guide to learn how to correctly install a winch cable or rope to your winch.
Re Spool the Cable or Rope Neatly After Each Use
As you operate the winch, the cable will often rewind onto the spool in a haphazard and messy way.
To prevent binding the next time you use the winch, you should unspool and re-spool the cable neatly while under tension after each use.
In the heat of the moment, it is easy to forget this vital aspect of winching. But it is the most helpful tip to prevent problems down the line.
Install a Fairlead With Spring-Loaded Rollers
People that use their winches professionally don’t have time to mess around with stuck winch cables.
Consider installing a fairlead with a spring-loaded roller. This type of fairlead ensures there is always tension on the cable when you spool it back in, allowing it to spool back onto the drum tight and neatly.
Replace a Kinked Cable
A steel cable with lots of kinks and bends can be challenging to wind back onto the winch neatly. If you often struggle with a stuck cable, replacing it with a new, unblemished one might be easier.
This is how to replace a winch rope or cable.
How to Dislodge a Stuck Cable from the Winch Hub
Many winches use an anchoring hole through the hub of the drum to hold the cable in place. The cable is locked into the hole or slot with a set screw or held in place with a wedge.
Wedge Style Fasteners

- Notice how the cable doubles back into itself, creating a loop.
- Use a hammer to punch an awl through this loop and try to pull the cable further through the hole. This will loosen the tension on the wedge so that it pops out.
- With the wedge out, you should be able to pull the cable back through the hole.
Hex Set-Screw Style Fasteners
- Remove the hex set screw.
- If the cable does not come out, you may need to use a 5/16 punch and a hammer to punch it out. Soaking it with PB-blaster or a similar product may help.
- Some cables are stuck so badly that you have to use a grinder and grind it down to a smooth surface near the hole. Be careful not to damage the winch drum.
- Then use a drill to drill out the cable. Use a drill bit that is slightly smaller than the hole. Again, be careful not to damage the winch drum.
- Soak the cable with PB-blaster and try hammering it out using a punch. You may need several attempts before the cable frees up.
FAQ
Why do winch cables get stuck?
Winch cables can get stuck due to lack of maintenance, overloading, improper winding, or due to rust and dirt buildup.
What to do if my winch cable is stuck?
Use caution when unspooling a stuck cable. If needed, use a flat-head screwdriver or pliers for gentle prying. Always wear gloves.
Can a stuck winch cable be repaired, or should it be replaced?
Depending on the severity of the issue, a stuck winch cable can be repaired. However, if the cable is frayed or damaged, replacement is recommended.
Wrapping Up
Wrangling with a stuck or jammed winch cable can be quite a task, but it becomes more manageable with the proper knowledge and techniques.
Whether you are dealing with uneven cable winding, rusted cables, or a “bird’s nest” tangle, the guidelines in this article will equip you with the tools and knowledge to tackle any winch cable problem efficiently and safely.