
Snowplows are one of the most popular accessories people get for their ATVs. They offer a simple way of adding practical value to a machine that would otherwise be used just for fun and recreation.
But before you go ahead and spend some of your hard-earned money on a brand-new plow, it’s a good idea to learn some snowplow basics.
So, how do ATV snowplows work?
In short, an ATV plow works by pushing the snow with a wide blade attached in front of the ATV. The blade can be made of either metal or durable composite material. The blade can be raised or lowered using either the ATV winch or manually.
Tag along as we explore the basic construction of ATV snow plows.
Related: Best Size ATV for Plowing Snow (Weight and HP)
ATV Snow Plow Design and Features
ATV snowplows feature relatively simple designs, where not much can go wrong. Any plow will push snow.
But if you look closer, you’ll notice some key design features that separate a good from a not-so-good plow. The basic components that each make up an ATV snow plowing system all play their part in ensuring a successful plowing operation.
Mounting-Frame Assembly
Any ATV plow must be mounted securely to the bike with a mounting frame. The frame must be solid and well-suited for the specific bike it’s being mounted on.
Dry, light snow plows easily without putting almost any strain on the plow or the ATV. But as soon as you get into some of the wet and heavy, or even some icy snow, the beating that needs to be absorbed by the plowing system can be pretty substantial.
Related: How Well Do ATV Snow Plows Really Work?
Unintended smashing into hidden rocks or getting hung up on frozen gravel will put even more stress on the frame, potentially ending the life of a poorly built snow plow mount.
If you use a mounting frame that is not well suited for your bike, you can even risk inflicting permanent damage to your machine.
In addition to being solid and secure, the mount needs to be made to be installed or uninstalled quickly through the season because most users prefer to remove the plow when not using it.
Ideally, the whole frame assembly should also come off quickly so you don’t leave it on throughout the warmer seasons.
Some ATVs feature OEM mounting points on the frame specifically designed so you can attach accessories like a snowplow.
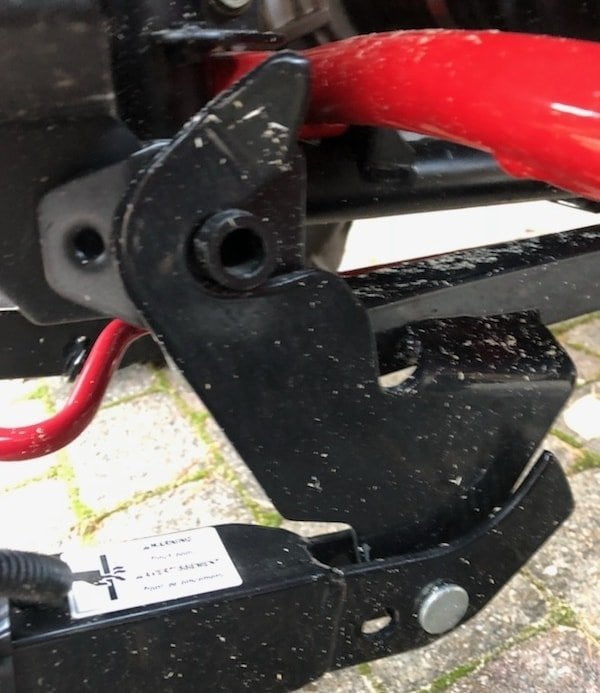
If your bike has this feature, you should look for a plow designed with this mounting system, as this will give you the best results.
If your bike does not have an integrated plow mount, you are best off getting a plow with a vehicle-specific mounting kit or a universal mounting assembly.
Look for a mount that attaches directly to the bike’s frame for a more robust result.
Push-Frame and Blade Tilting Mechanism
The frame assembly, also known as the push-frame, contains the mechanism that allows you to rotate and adjust the plow blade for optimal performance in different plowing situations.
The most common type is a fully manual system where you pull a lever to free the blade to rotate by hand to the desired angle. This is a cheap and bulletproof mechanism where little can go wrong.
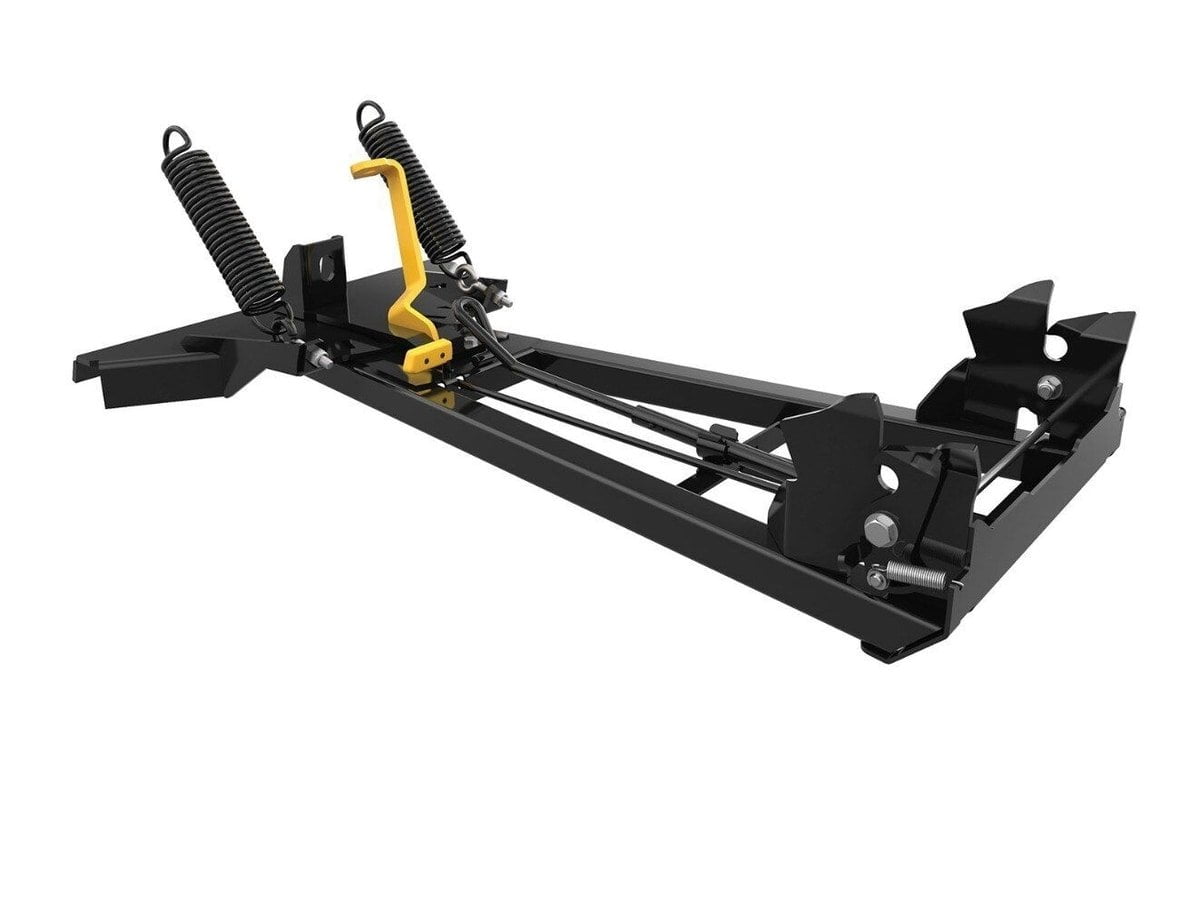
Some plows even feature hydraulic tilting and lifting of the blade. While this is very convenient, it does add some weight, cost, and installation time. If you plow professionally, the added convenience may make it the right choice.

Lifting Mechanism
Regardless of what mounting system the plow comes with, it should be made so that the blade can be lifted from the ground when not plowing and lowered again when plowing.
Generally, the effort required to lift the blade correlates to how much money you are willing to spend.
Your options range from fully manual systems that require you to get off the bike each time you want to lift the blade to automatic systems that are much faster and more effective.
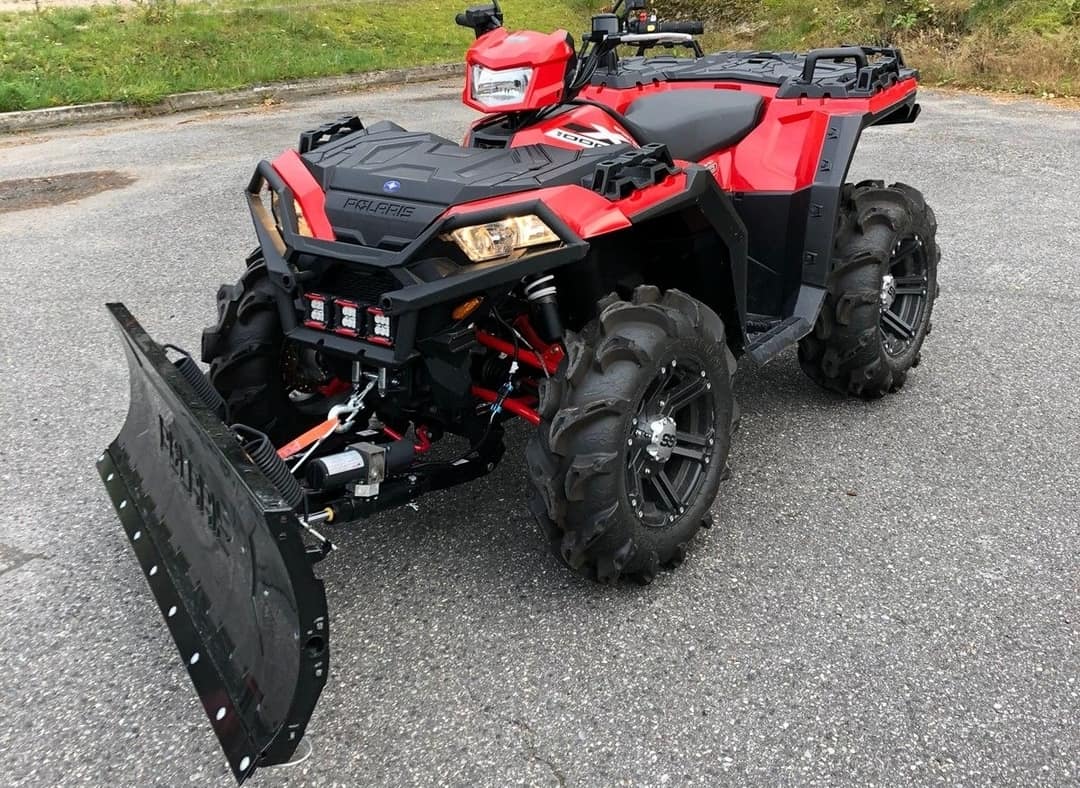
A system that utilizes the bike’s front-mounted electric winch for lifting the blade up and down is by far the most common. It allows you to raise and lower the plow from the driver’s position without adding too much cost and complexity to the system.
If your bike does not already have a winch and is unwilling to spend the money to get one, you should look for a system that uses a mechanical lever to lift the blade instead of a winch.
If your lower back can handle it, you can save some more by getting a plow that requires you to get off the bike and manually lift it with your bare hands.
At the other end of the scale, you find hydraulic systems.
These will not only allow you to tilt the blade with the push of a button. The hydraulics can also lift and lower the blade from the driver position. This is commonly named a direct lift system and is what most professionals prefer.
Plow Blade
The plow blade is the most critical component of the entire plowing system.
ATV plow blades are made of steel or rugged composite material. Both material types have some pros and cons to consider.
Steel will eventually rust, no matter how well you care for it. At the same time, it is a bit more rigid and durable than composite blades. The latter type has the advantage of never rusting and has a slick surface that helps snow slide over the blade more easily.
Blades are built with a curve so that the snow will move in a rolling motion when you push the snow forward, almost like scooping ice cream.

This rolling motion requires much less force than just pushing it with a straight blade, making moving the snow to either side much more effortless.
You can choose between a straight-blade design or a V-shaped blade.
The straight blade can be tilted to either side or kept straight, allowing you to push the snow straight ahead or to either side.
Tilting the blade to the left or right will be your best option when plowing driveways or clearing larger open spaces like a parking lot.
With the V-shaped blade, you also get the ability to set up the plow in a more traditional arrowhead shape. This will allow you to slice through even deeper and more compact snow than a straight blade.
You can also reverse the V, creating a scoop to make stacking the snow easier. This will keep the snow straight before you as you drive forward.
For the average home-owner, straight blade style plows are overall very popular as they are generally lighter and do not cost as much as a V-plow.
Replaceable Scrape Blade (Wear Bar)
At the bottom of the blade, you find a steel wear bar designed to wear as the plow is used and to be replaceable when needed.
This part of the plowing system will prolong your plow’s life expectancy by ten-fold and helps to keep a sharp edge for better cutting through any packed and icy snow.
If you plow many hard surfaces like asphalt or concrete, this part will wear quicker than on softer surfaces like gravel roads or dirt. Adjusting the flotation shoes optimally will prevent premature wear.
Flotation Shoes
Underneath the plow blade, you will find a set of flotation shoes, one on each side of the blade. Without this crucial design element, you would find yourself digging the blade into the ground with the risk of damaging both the surface you are plowing and even the plow and ATV.
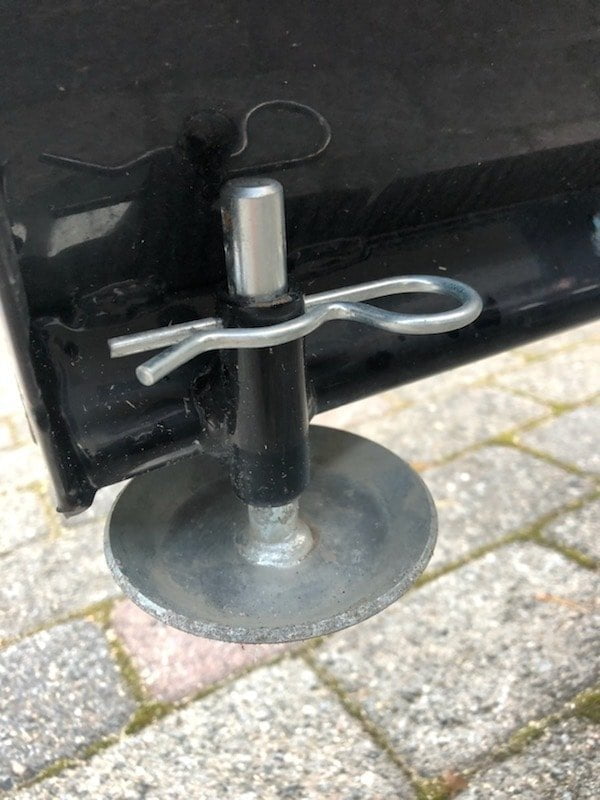
Plows use different flotation shoes, but circular discs are very common. They all serve the same purpose of maintaining a constant distance between the ground and the plow’s bottom.
On smooth surfaces like asphalt or concrete, you should adjust the shoes so that the plow barely touches the ground. But on more uneven or softer surfaces like gravel or dirt, you need to lower the shoes so that the blade “floats” about an inch above the surface.
Spring-Loaded Trip-System
Most plows are built to rotate down and slide over the object to prevent damaging your equipment if you hit unseen things under the snow.
Powerful springs hold the blade in place during regular operation, and the blade will not flip until you exceed the “holding power” of these springs.

Down-Force Kit (Optional)
When plowing icy or compacted snow, gravity alone may not be enough to keep the blade from floating on top. To overcome this challenge, you can install a so-called down-force kit.
The kit utilizes the power of a simple hydraulic cylinder like the one you find on your car’s back door to push the blade down. Cheap and simple!
Choosing the Right ATV Snow Plow Blade Width
Choosing the ideal blade width for your bike is crucial for a good result. The bike’s weight, combined with the snow conditions you plan on using the plow, determines how wide it should be.
Standard width options available are 48″, 54″, 60″, 66″, 72″, or 78″ wide blades.
With a too-wide blade, the ATV will struggle to push the snow effectively due to a lack of traction.
On the other hand, a too-narrow blade will make the plowing process take longer, and you also risk compacting the snow if the blade is narrower than your bike’s tire width.
As a guideline, you should pick a blade that fully covers your bike’s tire width, plus a couple of inches on each side. Then adjust for what plowing conditions you expect to get into.
Should You Build a DIY Snow Plow?
Due to the simplistic design, it can be tempting to take on building one as a DIY project.
But considering the high chance of messing up if you get one or more of the design features wrong, together with their relatively moderate purchase price, you might as well get one that is already made.
Optimized design and construction will give you much better plowing results at the end of the day.
How Much Does an ATV Snow Plow Cost?
A new ATV snow plow costs anything from $300 to $800, depending on factors like build quality, material quality, blade width, and whether it comes with advanced features like hydraulics.