
This guide will teach you how to fix any leaking ATV tire. This knowledge will likely come in handy sooner rather than later, and with just some simple tools, you can handle most flats entirely on your own.
Sometimes, the leak is small, and the tire will gradually deflate over several days. This is usually not the type of leak you must repair in the field, but it can wait until you return to your garage.
Other times, the leak happens abruptly and needs instant repair before you can continue riding. That’s why it can be a good idea to carry some means of fixing a tire in your onboard toolkit.
How to Locate the Leak
Before you can start repairing, you must determine where your tire leaks. There are four possible locations where the wheel can leak.
- Punctured tire
- Leak between the tire and the rim/bead
- Tire valve
- Cracked or bent rim
There are several simple ways to locate the leak’s source quickly.
Listen for Escaping Air
If the size of the leak is of some significance, you should be able to hear where the leak is. Once you have determined the leak’s approximate location, move on to the next step.
Apply Soapy Water and Look for Bubbles
You won’t be able to hear the minor leaks, but don’t worry; they can’t hide!
If you spray some soapy water on the tire where you think it is leaking, the escaping air will create tiny bubbles on its way out of the tire.
And voila, you have found your leak. Just a few squirts of dish soap in the water is all you need.
Plain water will also work if you are out in the woods, but the bubbles will be a bit harder to spot. When you think you have found the leak, you can rub some spit on the location to be sure, as spit is a more effective “bubble maker” than plain water.
How to De-bead and Re-Bead the Tire
Some of the methods for fixing a leak I will describe in this post will require removing the tire off the rim.
This may sound intimidating if you have never done it before, but fear not. This procedure is not as complicated as it may seem, and most DIY mechanics should be able to achieve it with no real issues.
But if you are uncomfortable doing this procedure, any tire shop can do it for you.
De-beading (Breaking the Bead)
Make sure you release all of the air out of the tire before you attempt breaking the bead. This is done by pushing down the small valve pin until all air is out or using a valve-stem removal tool to speed things up. These simple tools only cost a couple of dollars.
There are several ways you can go about doing this. We’ll go through a couple of suitable methods for those who rarely need to have this done and do not want to invest too much into equipment that will be standing unused most of the time anyway.
Your first option is to get a set of Beadpro spoons. They are cheap and relatively easy to use but take longer than other methods. Follow the instructions on the package closely.
Because of the small size of these tools, they would be a great addition to your onboard toolkit so that you can take off a tire even in the woods if needed.
The next option requires you to use a so-called bead-breaker. Additionally, you will need a couple of tire spoons and a valve-stem removal tool. You can get all of these tools at most automotive supply stores.
But buying a bead breaker is probably not the most fun way you can imagine spending the 100 dollars you should expect to pay for a decent one. Luckily, you can save most of this money if you are willing to use 15 minutes of your time on a little DIY project.

Re-beading (Seating the Tire to the Rim)
To do this, you need the following:
- An air compressor
- A cheap air chuck
- A solution of water and dish soap.
- And if this does not do the trick, you will also need a ratchet strap.
Start by spraying a generous amount of soapy water to the bead area of the rim. This will act as a lubricant. Without proper lubing, you will have difficulty seating the tire with the low pressure that ATV tires run.
Remove the valve stem core to allow air to be pumped inside the tire quickly. Then, fill the air with the air chuck as usual. You will hear an audible “popping” sound when the tire slips over the bead inside the rim, one for each side.
If your attempt fails, try strapping a ratchet strap around the outside of the tire. Tightening the strap will push the tire walls out against the beads, requiring less airflow for the tire to be seated successfully.
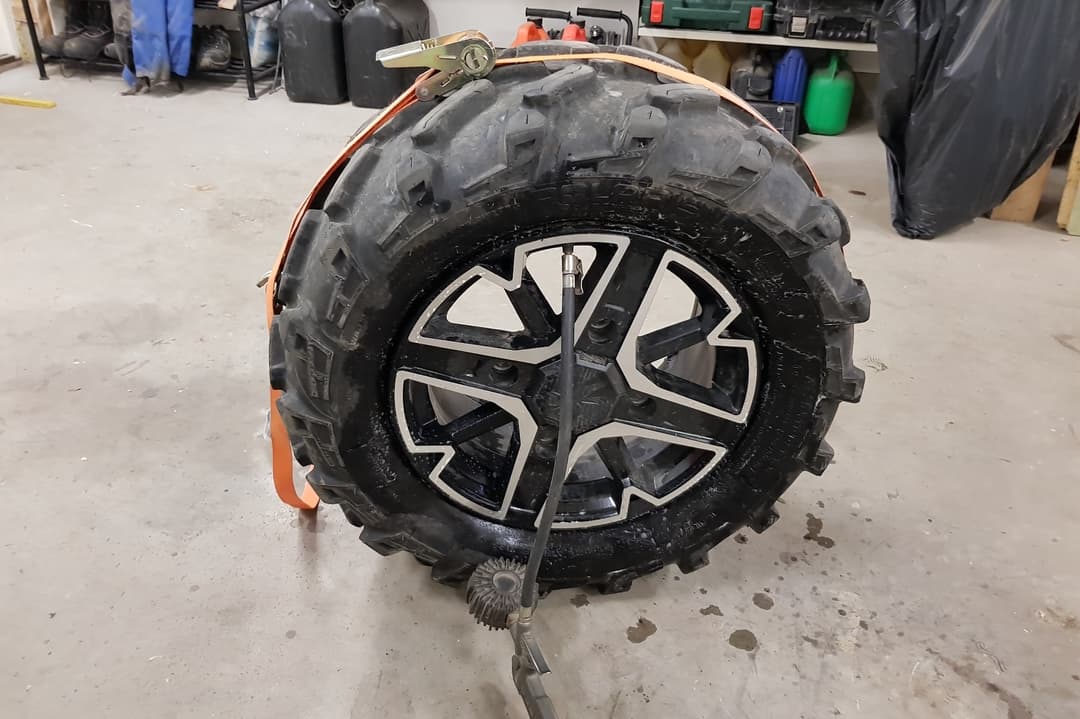
Then try again with the air chuck. Don’t go crazy putting too much air into the tire with the strap fitted. All you need is the tire to catch the bead and seat.
When the tire is seated, you can release the strap. Be careful; it is under much pressure and will come undone with much force.
Always make sure you don’t put too much air into the tire. When you hear the 2 “pops,” the tire is beaded, and you should release the chuck from the valve. Install the valve stem core and fill the tire to the desired air pressure using a gauged tire inflator.
You will need about 15 lbs (1 bar) of air pressure to get a tire seated. ATV tires with stiff sidewalls may require up to 40 lbs to seat correctly.
Just ensure you never exceed your tire’s rated maximum capacity, as this may result in the tire tearing or slipping over the rim’s lip. The force of a tire exploding like this can send you to the ER in no time; be cautious!
Three Ways to Fix an ATV Tire Leak
A leak in the tire itself is likely caused by a sharp object like a nail, screw, or thorn piercing the rubber, creating a hole where air can escape.
There are several ways to fix a tire puncture. Some are fast and easy but have disadvantages, like not lasting as long or making a huge mess inside the tire.
A durable and permanent fix requires more work and equipment and cannot be performed as easily out in the woods.
1. Plug the Hole With a String Plug
This is my favorite method for fixing a punctured ATV tire as it does not require you to break the tire’s bead and can be done in a hurry and anywhere with very few tools. It is not perfect, but it is good enough.
This method does have the disadvantage of not completely sealing the tire cord, leaving it exposed to the elements so that it may rust over time. Rust will weaken the cord, and given enough time, the tire can teat and explode.
However, this problem is more relevant to car tires, where you ride at much higher speeds and operate with much higher tire pressure.
To do this, you need a tire plug kit. These kits are cheap; you can get them at almost any automotive supply store.
- Use pliers to remove the nail, screw, or whatever object is causing your leak.
- Push the probing tool (the one with the rough edge on it) through the hole, in and out, about 4-5 times. This may require a lot of force, so get a good grip and utilize your body weight. This will clean debris out of the hole and make it the correct size for the plug you are about to fit.
- Then, place one string plug in the V-shaped groove at the end of the other tool with equal amounts of sting on each side.
- Push the tool with the plug attached almost entirely through the hole. Leave about 1/2 inch on the outside of the tire. It’s vital to get the plug all the way through the rubber.
- Pull the tool out with a determined pull. This will create a “mushroom” inside the tire, which helps keep the plug in place.
- Cut off the part of the plug sticking out of the tire with a sharp knife. I like leaving about 1/4 inch sticking out as this will wear down over time anyway. Done!
2. Patch the Hole With a Mushroom Plug Patch
This method is by many considered to be the proper way to patch a punctured tubeless tire.
You will need the following:
- A high-quality rubber patch
- Rubber cement
- A stitching tool
- A crayon
- Liquid tire buffer
- A tire buffer tool that connects to a drill
If your budget is tight and you have plenty of time, you can even use some 120-grit sandpaper.
- Start by removing the tire from the rim with the method and tools you chose to break the rim described above.
- On the inside of the tire, mark the area where your puncture/hole is located. Draw a ring with a diameter of approximately 10 cm, with the puncture in the center. This will make it easier to keep track of the hole throughout the process.
- The inside of the tire will be very smooth, so a patch will not stick well. Use the tire buffer to rough up the area within the ring you’ve marked. Continue until the smooth surface is gone, and you’re left with pure rubber. This should take 30-60 seconds with a motorized tire buffer tool and much more using sandpaper. Ensure you do not dig into the rubber too far to get into the tire cord.
- Clean the buffed area with some liquid tire buffer on a rag. This will remove the “rubber dust” from the buffing process and ensure good adherence. Finish by wiping with a dry part of the rag. The surface should feel a bit sticky compared to the untreated portions of the tire.
- Use the brush that came with your rubber cement box/ glue to apply a moderate amount of glue to the area where the patch will go. One full dip of the brush should be about enough. Apply the glue to a bit larger area than the size of the patch.
- Leave the glue for a couple of minutes to cure a bit. If you apply the patch when the cement is still wet, it will not attach.
- Gently remove half of the backing paper of your patch. Ensure you do not touch it with your fingers, as any oil or contaminant from your fingers will compromise how well the patch will stick.
- Check the glue with your finger. It should be tacky but not wet.
- When it’s ready, place the patch in the center of the hole. Push it with your finger to make it stick. Peel off the other part of the paper and “massage” the entire patch with your finger so that it sticks.
- Use the stitching tool and roll systematically with even pressure across the entire patch. Start in the center and work your way to both sides.
- Turn the stitching tool and do one more complete pass perpendicular to the first pass in step 10. Use about 1 minute in total.
- Use a knife to gently pull off the plastic on the back of the patch. The patch should not pull up anywhere when you do this. If so, you are done and can refit the tire. If the patch does come loose in some spots, you need to remove the patch and start all over.
3. Install a Tube
If you wish, you can install a tire tube, even in a tubeless tire, and it will stop any leak.
However, this method is not ideal for ATVs.
If you puncture the tube on the trail, you will have difficulty fixing it on the go. And because of the rough terrain we sometimes ride on, ATV tires are prone to puncture. You may end up doing a lot of patching.
It’s best to have a setup that allows you to fix a leak on the trails without too much of a struggle.
Also, the valve stems on a tubed tire tend to shift and tear when riding off-road with little air in the tires.
If you decide to install tubes in your tires, get tubes with valve stems purposely made for ATV use. These will not shift as quickly as those typically found in garden tractors and other small equipment.
How to Fix a Leak Around the Rim / At the Bead
This is the most common cause of why people get leaks in their ATV tires.
Dirty Bead Causing a Leak
Because ATVs run at such low tire pressure, sand/silt from muddy water will migrate between the bead and rim, creating a leak. These leaks will not appear suddenly but worsen gradually as more dirt gets trapped.
To prevent this, it’s good practice to break the beads and clean thoroughly between the bed and the tire once a year.
But some tires will leak no matter how smooth and clean the bead is.
If the problem persists after cleaning the bead on the rim, you can try removing the tire once more. Before you refit the tire, apply some bead sealer or silicone to the bead and the inside of the rim’s lip.
Bead sealer can be bought in most automotive stores or a tire dealer.
Please do not put too much air into the tire before the bead sealer/ silicone has set, as it will push out the sealant.
This fix should prevent any dirt from getting in between the rim and the tire in the future.
Rusted Rim Causing a Leak
This, of course, only applies to steel rims. Over time, water trapped between the tire and the rim, combined with dirt and sand, will cause the rim to rust.
The most permanent option to fix this is removing the tire and getting the rims sand-blasted and powder-coated. This will make any rusted old rim look new and make a tight seal between the tire and the rim.
If you don’t wish to spend (almost) any money to get the leak fixed, you can try the following:
- Remove the valve stem core to let out any air, and remove the tire from the rim using your preferred method and tools for breaking the bead.
- Clean the inside lip of the rim, the area that comes in contact with the tire, with some soapy water and a sponge.
- Use sandpaper, first 120 grit, then 180 (or in the ballpark) to remove as much rust as possible. You can also use power tools to do this, depending on what you have.
- Clean again with soapy water and let dry.
- Apply bead seal or silicone on the lip of the rim before you refit the tire. This will, in most cases, fix your leak.
If all else fails, use green slime or install a tube.
Damaged Rim or Tire Causing a Leak
If you’ve hit a rock or, in other ways, damaged the tire or rim where it seals, you may get a leak.
As long as the rim is fine structurally, you may be able to fix this by removing the tire from the rim and smoothing out any nicks with a Dremel tool or some fine sandpaper.
Apply a bead-sealer before you refit the tire if you want to be safe.
How to Fix a Leaking Valve Stem or Valve Stem Core
If the air leaks from the core, try removing it with a valve stem core removal tool, cleaning it with soapy water, and replacing it. If this does not fix it, you can try replacing the valve stem core with a new one.
If the air escapes from the outside of the valve stem, it is likely bad or poorly fitted. Valve stems are cheap, so your best option is to replace them if they leak.
De-bead the tire from the rim and use a valve stem tool to remove the old valve stem. Clean the area where the valve stem sits and spray with soapy water before inserting a new stem from the inside of the rim.
Again, pull out with the valve stem tool until the new stem pops into place. You will need a valve stem tool.
Related: How to Replace the Valve Stem on a Tubeless Tire
How to Fix a Leak Caused by a Cracked or Bent Rim
A cracked rim can sometimes be welded successfully with a TIG or MIG welder if the crack is not too big.
However, achieving a satisfying result requires some above-average welding skills. I recommend searching for a local specialist company to do this to ensure you get a good result.
A slight bend in the rim’s lip after hitting a rock may also make for a bad seal. Try gently tapping the bent part with a rubber mallet to straighten it out. Do not use a metal hammer, which may damage the rim further.
Quick Fix: Use Tire Slime to Stop the Leak
Putting a product like green slime or similar inside the tire will likely fix almost any leak, except maybe a bad valve stem core or a ripped tire.
Remember that the slime makes a mess that needs cleaning the next time you remove the tire from the rim. You will likely not become very popular at your local tire shop when you give them tires filled with slime that will get their tire machine all messed up.
But if you are willing to live with the mess, it is a cheap, easy, and quick option to fix almost any leak.
As a bonus, the slime will instantly repair new leaks as soon as they occur.
Remove the valve stem core to release all air before putting the slime into the tire so the back pressure won’t create a mess.
Be aware that the slime can unbalance the tires, causing the bike to vibrate when riding. Ensure you go for a ride instantly after injecting the slime, and don’t use too much.