
To prevent your ATV from overheating, ensuring the coolant is in good condition is critical. Sometimes, a regular coolant change is not sufficient. Instead, you might need to perform a coolant flush for optimal engine health.
This article aims to guide you through the process of flushing the cooling system on an ATV. You’ll learn what a coolant flush is, how to determine when your ATV requires one, and a detailed, step-by-step tutorial on performing a coolant flush.
What Role Does Coolant Play in an ATV Cooling System?
Engine coolant systems vary in design, but the main principles remain the same. A basic ATV cooling system consists of a few key components:
- A radiator
- An electric cooling fan
- An expansion tank or reservoir
- A water pump
- A thermostat
- Engine block coolant channels
- Coolant transfer hoses
- Coolant fluid (Antifreeze diluted with water)
The coolant’s primary task is transferring heat from the engine to the radiator. The coolant heats up while inside the engine and cools down when passing down through the radiator.
After cooling down, the coolant is sent back into the engine, and the cycle repeats itself. A pump ensures a continuous coolant stream from the engine to the radiator and back.
Coolant consists of distilled water, chemicals such as glycol or ethylene, and various additives. The chemicals do not carry heat effectively, so we dilute them with water.
But why do we use coolant and not plain water?
Coolant is anti-corrosive: Using plain water as a coolant would cause internal corrosion in the radiator and engine, reducing the cooling capacity over time. Coolant contains anti-corrosive additives.
Coolant increases the boiling point: Coolant contains chemicals that raise the boiling point, allowing the cooling system to function at higher temperatures without boiling and overheating.
Collant decreases the freezing point: The chemicals in the coolant ensure that the fluid stays liquid at sub-zero temperatures.
Coolant prevents deposits and foaming: Additives in the coolant avoid deposits of limestone and others that would reduce the cooling system’s efficiency. They also contain the liquid from foaming, which would reduce their efficiency.
What Is a Coolant Flush?
Coolant does not last forever. Over time, the coolant breaks down, becomes less effective, and eventually turns acidic, potentially causing damage to the engine and radiator.
That is why regular coolant changes are required as a part of a proper ATV maintenance schedule.
Some manufacturers, like Yamaha, recommend replacing the coolant every two years, while others, such as Polaris and Can-Am, operate with five-year coolant replacement intervals.
A basic maintenance checklist for the cooling system on an ATV consists of the following steps:
- Check the coolant level. Top off if necessary.
- Test the coolant strength (freezing point).
- Inspect the radiator, hose, and coolant expansion tank for signs of wear or damage.
- Pressure test the cooling system and pressure cap.
- Cooling fan function test.
- Coolant replacement.
- Drain old coolant.
- Refill new coolant.
- Bleed out air.
Flushing the cooling system, however, is usually not a part of your regular maintenance routine.
A coolant flush is like a service to the cooling system’s internals. After draining the coolant, a mixture of flushing medium and water is washed through the entire system to clean out rust, dirt, sludge, and any remaining old coolant.
Note that a coolant flush is slightly more comprehensive than a regular coolant change, as it adds a few more steps to the process. The flushing procedure happens after draining out the old and used coolant but before adding new.
Please refer to the guide below for details on performing a coolant flush on your ATV.
When Does Your ATV Need a Coolant Flush?
As long as you keep up regular coolant changes and only use the correct type of coolant, you may never need to flush the cooling system on your ATV.
However, there are several situations where a proper coolant flush is beneficial or even necessary.
When the Coolant Is Too Old
Coolant maintenance is frequently overlooked. It’s easy to miss when a coolant change is needed.
As time passes, the corrosion inhibitors in the engine coolant degrade, elevating the risk of internal corrosion in the engine or radiator.
If a coolant change has been delayed for too long, the breakdown of these inhibitors might be too advanced. In such cases, doing a complete coolant flush is more effective to guarantee that only fresh coolant is used in the system.
When the Freezing Point Is Out of Spec
The typical water-to-coolant ratio is 50/50 or 40/60. The mix becomes overly diluted if there is too much water relative to the coolant. This reduces the strength of the coolant, meaning its freezing point is too high. Adding too much coolant to water has the same effect.
The Minimum recommended coolant strength is typically -30ºC (-22ºF). Check the coolant’s strength (specific gravity) using an antifreeze tester (coolant hydrometer).
However, the test will not tell you the cause when the coolant does not carry the required strength. If you’re confident that the coolant is healthy, but the mix is off, you could adjust by adding more coolant or water.
Otherwise, doing a complete flush and starting with a new coolant is better. Choosing a pre-diluted mix helps eliminate any risk of messing up the mixing ratio.
When the Coolant Is Discolored
As a bonus, when testing the coolant strength, you get to see if the coolant shows any discoloration or signs of contamination.

Fresh coolant should have a transparent, bright-colored appearance. When it’s turned brown and cloudy, you know the coolant breakdown and corrosion have gone too far.
In that case, you should always perform a complete coolant flush to eliminate all the old and degraded coolant.
When You Don’t Know What Type of Coolant Is on the ATV
Coolants come in various colors, from pink, red, orange, yellow, and blue to green. You used to be able to determine the type of coolant and what chemicals it was composed of by its color.
Nowadays, there is no way of knowing for sure. While some manufacturers apply traditional color coding, there is no guarantee the ingredients will go along.
Different coolant types do not mix well and may cause harm to your engine. If you bought your ATV used and don’t know what coolant is on the ATV, you should flush all the old coolant to eliminate the risk of mixing two different types.
If Your ATV Has Overheating Issues
Flushing the coolant can help restore proper cooling in an ATV with overheating issues.
If your ATV is boiling or the temp light goes off, a coolant flush should be one of the first things to try.
A coolant flush may or may not solve the problem on your bike, but it’s a relatively cheap thing to try before looking into more serious causes.
As a Preventative Measure
Even if no signs indicate a coolant flush is in place, you might choose to do one as a preventative measure.
Debris may have started to build up even if the cooling system performs as expected.
A coolant flush to keep the system clean and clear of unwanted debris is a relatively affordable service that helps reduce the risk of engine damage and other more costly issues down the line.
How to Do a Coolant Flush on an ATV
Some manufacturer service manuals ask you to see a dealer do a coolant flush. However, the procedure is relatively straightforward and is something most people can do at home.
This guide provides a step-by-step overview of the entire process of flushing an ATV cooling system. It covers everything from draining the old coolant and flushing the system to refilling with new coolant and bleeding out any trapped air.
None of the various ATV service manuals operate with precisely the same procedures, but the main principles are much the same.
A basic coolant change includes the following steps:
- Drain the used coolant. Refer to the “Draining procedure” below.
- Fill with new coolant and blee out the air. Refer to the “Filling and bleeding procedure” below.
When performing a coolant flush, you add a few more steps, but the basic draining, filling, and bleeding procedures remain the same.
- Drain the used coolant. Refer to the “Draining procedure” below.
- Flush the cooling system. You’ll be using a mix of flushing medium and water, and you’ll be draining, filling, and bleeding several times. Refer to the “Flushing procedure” below.
- Fill with new coolant and bleed out the air. After flushing, you fill up with new coolant as usual. Refer to the “Filling and bleeding procedure” below.
Caution! Escaping steam or hot water can cause severe burns. Never remove the pressure cap (radiator cap) or the cap on a pressurized reservoir tank while the engine is warm or hot. Coolant draining should be performed when the engine is cold.
Notice: Before you begin, ensure you’re not voiding any remaining warranties and understand the potential hazards.
Parts and Supplies You Will Need
- A container to catch the used coolant.
- A funnel.
- Socket for the drain bolts, typically 8mm or 10mm.
- New coolant according to manufacturer recommendations and specs.
- Shop towels to soak up spills.
- Nitrile gloves and protective eyewear – coolant is a toxic and corrosive chemical.
Place the ATV on a Flat Level Surface
This will ensure the coolant drains entirely and the levels are correct when it’s time to fill the new coolant.
The Draining Procedure
When doing a coolant flush, you’ll get the best results if you start with a completely drained cooling system. The steps involved vary depending on the ATV’s design. The key is to get as much of the used coolant out of the system as possible.
This procedure also applies when draining out the flushing medium and water according to the “Flushing procedure.”
1. Remove the Radiator Pressure Cap
Removing the radiator cap will make draining easier by allowing air into the system as the fluid drains.
The radiator cap is on top of the radiator, usually in front of your ATV. You may need to remove a few plastic covers or the front rack for access.

With a cold engine, turn the pressure cap anti-clockwise for about half a turn to open it. Remove it carefully to release any pressure in the cooling system.
2. Place a Container Under the ATV

Prepare a suitable container to collect the used coolant. The chemicals used in most coolants are poisonous and must be disposed of properly.
3. Loosen the Coolant Drain Bolt (If Available)
Most ATVs have a coolant drain bolt located on the lower part of the water pump assembly. Follow the radiator hose to find the pump on your bike.

Notice: If the water pump is inaccessible or has no drain bolt, go to step 4 below.
To access the water pump and drain bolt, you may have to remove some components, such as plastic side covers, parts of the footwell, CVT duct, or exhaust shield.
Look for markings on the pump housing indicating the drain bolt’s location. Use the correct size socket to loosen the bolt without removing it.
The coolant comes out with a fair amount of pressure. Don’t remove the bolt entirely until you have positioned the container.
Release the drain bolt and copper washer from the water pump housing swiftly, trying not to make too much of a mess.
Allow the coolant to drain completely. Don’t re-install the drain bolt yet.
4. Disconnect the Lower Radiator Hose

Notice: If you’ve successfully drained the coolant through the water pump as outlined in step 3 above, you can likely skip this step as the water pump is usually placed lower than the bottom of the radiator. But there is no harm in performing this as well as a precaution.
On some ATVs, the water pump is inconveniently placed, so it’s better to drain the coolant through the bottom of the radiator.
Some radiators have a dedicated drain bolt, while on others, you have to disconnect the bottom radiator hose.
Tip: Take note of the hose clamp position before loosening it. When re-installing the hose, the clamp should be in the same place for a good seal.
Disconnect the lower radiator hose by the radiator and allow the coolant to drain into a container for proper disposal.
5. Drain the Coolant Overflow Tank or Remote Pressure Tank
Most of the fluid should be drained at this point, but there is likely some still left in the coolant overflow or pressure tank, usually located near the radiator at the top front end of the ATV.
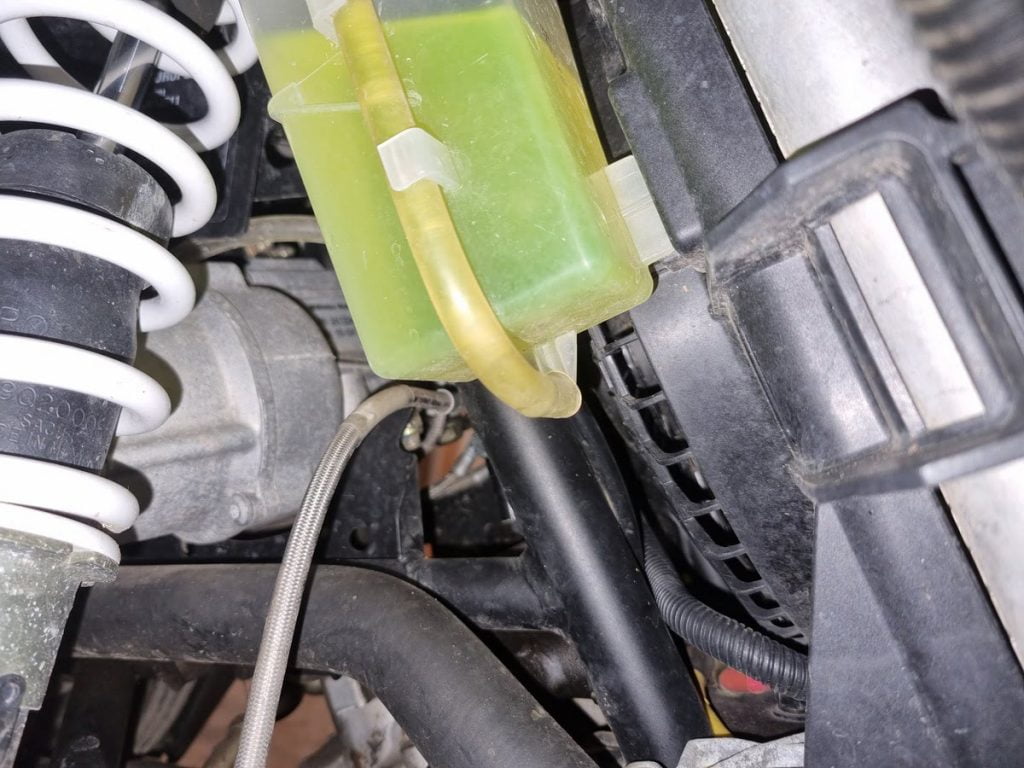
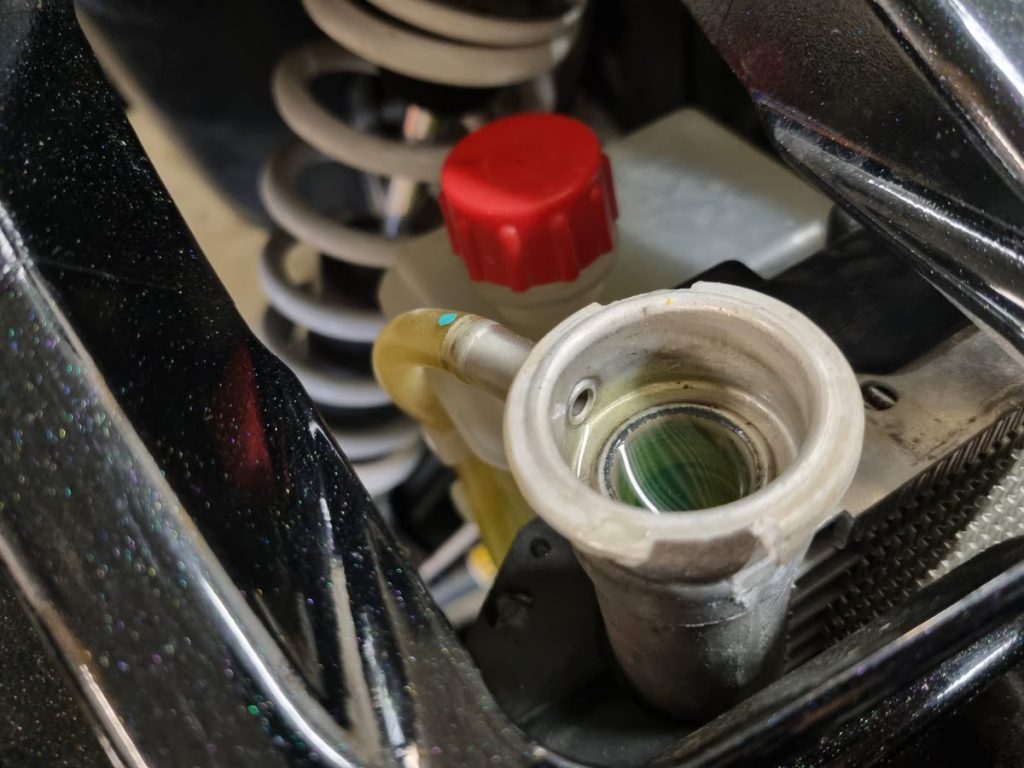
Your ATV will either have a non-pressurized overflow tank (also known as a recovery tank) or a remote coolant pressure tank. You can tell them apart by what type of cap they have.
An overflow tank is not under pressure and has a simple snap-on cap. A pressure tank is under pressure when the engine is hot. It has a more robust tank design and a screw-on-style cap.
When performing a coolant flush, the main difference is to remember not to open the pressure tank while the engine is hot, just like you should never open a radiator pressure cap while the engine is hot.
Disconnect the hose at the bottom of the tank to drain any remaining fluid in a container for proper disposal. Re-install the hose when all of the liquid is drained.
6. Re-install the Coolant Drain Bolt and the Lower Radiator Hose
After all the fluid is drained, re-install the drain Bolt with a NEW sealing washer. Tighten to spec, typically 10Nm +/- 1Nm of torque.
Also, re-install the lower radiator hose to the radiator. Try to place the clamp in the same position as it was.
The Filling and Bleeding Procedure
This procedure applies when filling the cooling system with a mix of water and flushing medium or new coolant after flushing.
Some ATVs have bleed screws on the water pump and thermostat housing to help bleed out trapped air.
Others apply a method for bleeding the air through the top of the radiator. The procedure for filling and bleeding varies slightly between the two.
If your ATV has bleed screws, your best option is to choose this method.
1. Open the Radiator Pressure Cap
Ensure the radiator is cool to the touch so no pressure is built up in the cooling system before carefully removing the radiator pressure cap.
2. Loosen the Water Pump Bleed Bolt (If Available)
The air bleed bolt is on the top of the water pump housing. Loosen the bolt without removing it. This will allow air to escape as you fill the system with fluid.
3. Fill the Cooling System With Fluid Through the Radiator Neck
- If you’re flushing, you’ll use a mix of water and a flushing medium according to the instructions on the bottle. Tap water is fine for slushing as it will not stay in the engine long.
- If you’re filling new coolant, use coolant according to manufacturer recommendations. Do not dilute the coolant with tap water; use only distilled or de-ionized water to prevent deposit build-up that may restrict coolant flow.
Tip: If the radiator does not have a cap, fill through the pressure tank. Use a funnel to avoid spills and fill fluid through the radiator’s neck.
- For ATVs with a bleed bolt: Fill until fluid flows through the bleed bolt hole. Then, tighten the bleed bolt according to the spec. Continue filling until you can see fluid in the radiator filler neck.
- For ATVs without a bleed bolt: Slowly pour the fluid into the radiator filler neck until you can see the fluid level, or it reaches the bleed return hole inside the filler neck.
Tip: While filling, squeeze the coolant lines to aid fluid flow and help purge the system of air. This is known as burping the cooling system.

Leave the pressure cap off for now.
4. Remove the Recovery Bottle Fill Cap and Fill to the Correct Level

On most ATVs, the coolant should be between the MIN and MAX lines when the fluid is cool. In that case, fill to the MAX level. Some ATVs use terms such as the lower lever and upper level or cold fill and warm fill.
Note that some ATVs should be only at the MIN-line when the fluid is cool. Please refer to your service manual to ensure you don’t overfill.
5. Loosen the Cylinder Head Bleed Bolt (If Available)
Some ATVs have a bleed bolt on the thermostat housing near the cylinder head.
Release this bolt without removing it to bleed out any air. When there is no more air but only fluid coming out of the bolt hole, tighten the bolt to spec.
6. Start the Engine and Let It Idle for 5 to 10 Minutes
Install any components you’ve removed to access the bleed bolts.
With the pressure cap off, start the engine and let it idle for 5-10 minutes to warm up. The radiator fan should cycle on and off at least two times. Leaving the cap off allows air to bleed out and will enable you to add more fluid if necessary.
The level will drop as soon as you start the engine and once more as the thermostat opens, allowing fluid into the system.
With the engine still idling, top off the radiator with fluid when required.
When the engine has warmed up, snap/rev the throttle five times to release any remaining air.
Before shutting down the engine, install the pressure cap to avoid fluid spitting.
Notice: If you leave the engine running too long after the thermostat opens, fluid may begin seeping through the top of the radiator. If this happens, it is time to stop the engine to prevent further spillage.
Tip: If you’re struggling to remove air from the cooling system, consider lifting the front end of the ATV by one to two feet while the engine is idling. This elevation helps move any trapped air toward the front of the ATV and out through the radiator filler neck.
A secure method to raise the front end is by driving the front wheels up one or two steps of an outdoor concrete staircase. Lower the ATV back down before adding more fluid to ensure correct levels.
7. Top off the Radiator and Fill the Reservoir/Pressure Tank
Allow the engine to cool completely. You should be able to touch the radiator with your bare hands.
- Top off the radiator and install the pressure cap.
- Top off the coolant tank to the max level mark. Do not overfill. Re-install and tighten the reservoir cap. Back off the cap 3-4 times before installing the cap to make sure you don’t twist the overflow line.
The filling procedure is now complete. Any air remaining in the system should continue to bleed through the recovery bottle. Keep an eye on the fluid level the next few times you ride.
The Flushing Procedure
1. Drain Off All of the Used Coolant
Please refer to the “Draining procedure.”
For now, you do not need to install the drain bolt and bottom radiator hose (step 6).
2. Flush the Cooling System Using Tap Water
With the drain bolt out or the bottom radiator hose disconnected, pour a gallon or so of regular tap water into the radiator filler neck. Collect the fluid in a container for proper disposal.
3. Flush the Cooling System With a Mix of Flushing Solution and Water
Flushing solution, or radiator flush, can be bought at most automotive stores. Any brand will work; just ensure the fluid is compatible with aluminum radiators.
Notice: Make sure to follow the instructions provided with the flushing solutions, as they may differ slightly from this guide.
With the drain bolt out or the bottom radiator hose disconnected, pour a mix of water solution and tap water into the radiator filler neck. Collect the fluid in a container for proper disposal.
Ensure you save enough flushing solution to fill the entire cooling system once more.
4. Install the Drain Bolt and Radiator Hose
Please refer to step 6 in the “Draining procedure.”
5. Fill the Cooling System With a Mix of Flushing Solution and Water
Please refer to the “Filling and bleeding procedure.” This includes running the ATV through a heat cycle.
6. Drain the Slushing Solution and Water Mixture
Please refer to the “Draining procedure.”
7. Fill With Water, Heat Up, and Drain Once More
Repeat steps 4 through 7, now only using regular tap water.
The flushing procedure is now done, and you are ready to fill fresh coolant into the system according to the “Filling and bleeding procedure.”
Wrapping Up
Proper coolant maintenance, including timely coolant flushes, is vital for the health and efficiency of your ATV’s cooling system.
By understanding and applying the detailed steps in this guide, you can effectively prevent overheating and ensure optimal performance of your ATV.