
Knowing the basics of how the brakes work is just one of those things any ATV owner should learn. This knowledge makes troubleshooting a lot easier when they do not work correctly. You are also better able to maintain and keep the brakes sharp at all times.
Be aware that there have been many variations of ATV brake systems. The principles described in this post cover most but not all variants.
How ATV Brakes Work
All-Terrain Vehicles (ATVs) employ various braking systems, including disc brakes, drum brakes, or a harmonized combination of both for enhanced vehicular control.
Disc Brakes
In ATVs equipped with disc brakes, upon activation of the brake via the hand lever or foot pedal, the brake fluid is pressurized through the brake lines.
This process activates the brake piston, propelling the brake pad against the brake disk or drum. This results in the creation of friction, inhibiting the rotation of the wheels and thus halting the ATV.
Drum Brakes
In contrast, ATVs equipped with drum brakes function differently.
When the brake lever is pulled, it moves a solid steel cable. This cable forces the brake shoes outward, pressing them against the inner surface of the brake drum.
The resultant friction from this interaction serves to decelerate the vehicle, ensuring a safe and controlled halt.
Essential Components in an ATV Brake System
1. Hand Lever
The rider pulls or squeezes the lever against the handlebar to operate the brakes. Pulling the lever will generally activate the brakes on all four wheels.
2. Master Cylinder
Next to the hand lever on the handlebar, you find the master cylinder. This consists of a small reservoir containing brake fluid and a small piston that works as a hydraulic actuator. When the hand lever is activated, the small piston pushes brake fluid down the brake line, making it a hydraulic system.
The reservoir should have a gauge to tell the current level of fluid inside. On ATVs with the “eye” style indicator, a dark center usually means that the reservoir is full. A white center indicates low levels of fluid.

Consult your owner’s manual to learn how to check the level on your specific bike. Ensure it is above the minimum at all times, but do not overfill either. Doing so may cause brake drag or brake lock-up.
3. Brake Lines
The brake line is a pipe or tube transferring brake fluid from the master cylinder to the caliper on each wheel. The line must withstand high pressures and consist of flexible lines or solid steel or copper pipes.
4. Brake Fluid
The hydraulic fluid is what makes the whole system work. Using the right fluid type for your ATV is essential, usually DOT 3 or DOT 4. Notice that the brakes will not function properly if just a tiny amount of air gets into the system.
5. Brake Caliper
Each wheel hub has a brake caliper, a metal clamp with one or more hydraulic pistons designed to keep the brake pads in place and press them against the brake disks when braking.
6. Brake Disk
Each wheel has a brake disc that spins at the same speed as the wheel. When the brake fluid reaches the piston inside the caliper, the piston is pushed against the brake pad, which is pressed against the brake disc.
The brake pad is made of a material that can handle the friction this creates, making the wheel spin slower.

Hand lever-operated disc brakes activate the brake calipers either on all four wheels. Or they activate only on the two front wheels together with one of the rear wheels.
The latter option is valid on bikes that rely on the rear diff to have brakes on both rear wheels. Thus needing a caliper on only one of them.
The pressure on all calipers is equal as there is no proportioning valve like most on-road vehicles have.
How Foot Pedal-Operated Disc Brakes Work
Many ATVs also feature a foot pedal in addition to the hand lever. On ATVs that only feature disc brakes on all four wheels, operating the foot brake pedal does the same as pressing the hand lever.
But there are a few key differences.
The foot pedal has its dedicated master cylinder that pushes brake fluid to the calipers, as described above. However, the brake fluid reservoir is usually somewhere else on the bike.
On a Polaris Sportsman, the master cylinder is by the pedal, but the brake fluid reservoir is in front of the ATV, underneath the cargo rack panel.

Another key difference is that the foot pedal does not operate the front brakes on some ATVs. On some, it will only activate the rear brakes. On these models, the foot pedal master cylinder is connected to the front calipers.
The most common setup on modern ATVs is one caliper on each wheel. The hand lever operates all calipers, while the foot pedal only operates the rear calipers.
But there are some variations out there.
Some older bikes have a separate caliper (trailing) for the foot brake, usually fitted on either of the rear wheels. And even on some newer bikes, you will only find one single caliper fitted on one of the rear wheels.
Bikes set up this way, with a single caliper on one of the rear wheels, will likely have a locked rear diff to make both wheels brake when you step on the pedal.
Learning how your specific bike’s brakes work is advised because mistakingly believing you will get full brake power only from using your foot pedal can be a fatal mistake.
If you suddenly need to stop at fast as possible, activating just the rear wheel brakes will give these bikes a much longer stopping distance than when all wheels are braking.
To learn how your bike is designed, inspect where the foot pedal master cylinder’s brake lines go.
Or, you can test the bike at slower speeds on an open gravel lot with a low risk of accidents.
If the rear end starts sliding to either side when you use the foot pedal but not when you’re using the hand lever, you know that the foot pedal likely only activates the rear brakes.
Drum Brake Systems
ATVs that do not have disc brakes will likely have drum brakes. Drum brakes are more common on cheaper or older models. You may also run into models with drum brakes on the rear wheels but disc brakes on the front.
Drum brake systems are relatively simple designs but are generally less effective than disc brakes.
These are the components they are made up of and how they work together:
1. Hand Lever or Foot Pedal
Operates the same way as on disc brake systems.
2. Brake Wire
You’ll find a brake cable connected to the hand lever or foot pedal. The cable consists of a thin steel wire inside a protective housing that can slide freely back and forth as you operate the brake lever.
3. Brake Hub
The brake hub is fitted where the suspension meets the wheel and spins freely at the same speed at which the wheel turns. The drum is all metal, and inside, it is shaped like the inside of a drum, hence the name, drum brakes.
The inside steel walls of the hub serve the same purpose as the discs on the disc brakes. They create friction when brake pads are pushed against them.
4. Brake Shoe
Housed inside the brake drum, you’ll find the brake shoe, which works similarly to brake pads on disc brakes. Two brake shoes in each hub are the most common setup.
The brake cable connects to a lever arm on the brake hub that, when pulled, forces the brake shoes outward against the steel drum, creating the braking effect.
Small springs connected directly to the shoes, then pull them away from the drum when you release the brake lever or foot pedal.
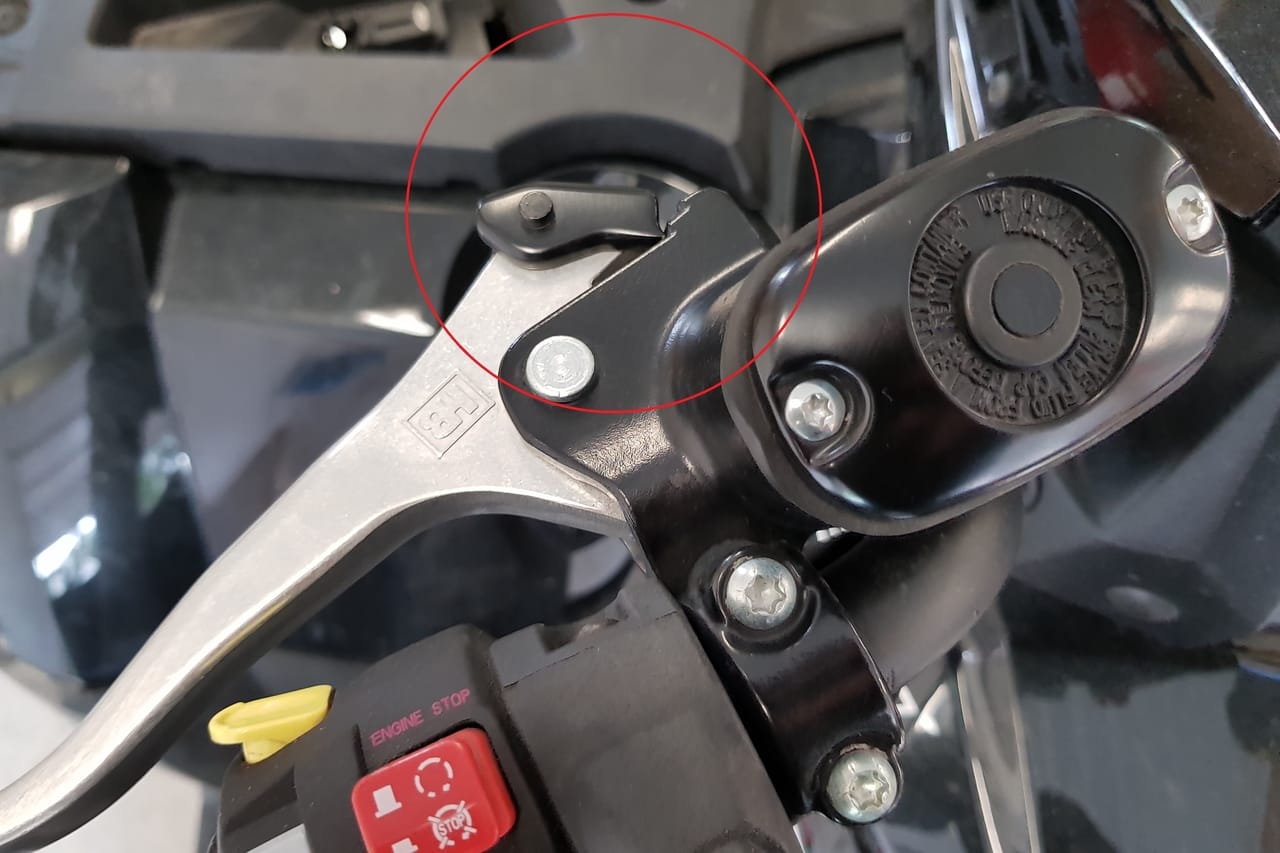
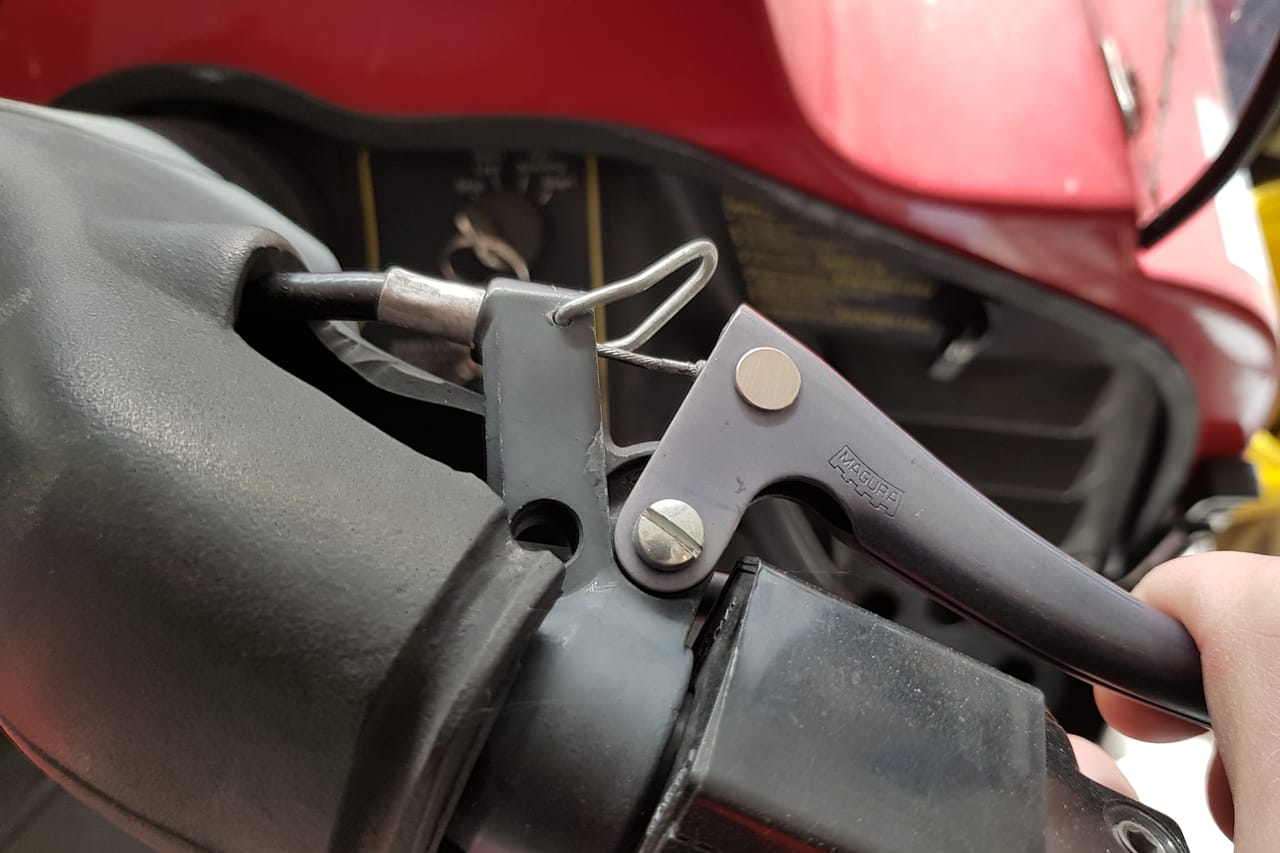
Parking Brake
Most ATVs have a parking brake system to prevent the vehicle from accidentally moving whenever parked.
I always use it when parking in steep hills to help the bike’s transmission slip more easily in and out of PARK.
While on many cars, you usually have a separate brake wire that bypasses the hydraulic braking system; this is not the case on ATVs.
Usually, the parking brake works by locking the hand lever in the activated position. This utilizes the bike’s primary braking system as a parking brake. It will keep the brakes on all four wheels constantly activated until the brake is released.
- To activate the parking brake, pull the brake lever against the handlebar. While holding the lever in this position with one hand, use your free hand to flip the locking mechanism, preventing the lever from retracting when you release your grip.
- To release the parking brake, squeeze the hand lever and release the locking mechanism.
The locking mechanism looks slightly different from model to model but works by the same principles. On my Polaris, you find a two-step switch where you can choose how much force you wish to apply.
You may find a more straightforward hand brake locking mechanism like the one on my old Lynx snowmobile on older bikes.
ABS (Anti-Lock Braking System)
As Can-Am recently introduced ABS braking systems to the ATV world, I’ll end this post with a few lines on how ATV ABS systems.
An ABS has the same components as a conventional hydraulic brake system with additional anti-locking features.
The additional components include a hydraulic electronic control unit (ECU), a few hydraulic pressure sensors, and speed sensors.
The sensors detect how the wheels behave in different braking situations and send their signal to the ECU.
The ECU is the brain of the operation, and based on the sensors’ signals, it calculates and adjusts how much braking force needs to go to each caliper for optimal stopping power.
This happens instantly, much faster, and more precisely than any rider can achieve on non-ABS systems.
Related Questions
What to do When ATV Brake Pads Squeal?
ATV brake pads that squeal might be caused by dirt on the brake pads and discs. Try cleaning them with brake cleaner. Installing an anti-squeal shim made of aluminum can also be effective.