
Trying to identify the reason why your ATV battery keeps draining can be pretty frustrating. This guide will help you troubleshoot the issue.
You may be riding all day, and everything seems to work correctly. Then you park the ATV for the night only to find the battery completely dead the following day.
When you turn the key, you get no reaction or only a clicking sound from the starter.
This behavior is typical, but your bike may behave differently depending on what is causing your battery to drain.
Or, the battery can lose its power in hours when not in use, or it might even become drained when you are out riding.
In the latter case, there is usually a completely different cause for your problems than the first. I will cover both situations in this post.
Thankfully there is a lot of relatively straightforward troubleshooting you can perform to identify and even fix whatever is causing you problems.
Sometimes the error is cheap and easy to fix. Other times it can be more of a challenge and require purchasing some parts. I recommend going through this list of common issues before throwing money at the ATV, like buying a new battery or other components.
Where to begin?
To isolate what is causing the problems, you need to observe how the bike behaves in different situations. When does it drain? When you are riding or when it is just sitting in storage? How long does it take for it to drain?
Doing this lets you quickly rule out several possible causes, and you won’t need to waste time and money on the wrong things.
Begin with the step below that matches your bike’s behavior the best. Under each listed cause, I describe how the ATV will behave, how to troubleshoot, and possibly how to fix the issue.
Sometimes you can locate the drain immediately; other times, it takes a couple of tries before you succeed.
1. Bad or old battery – not holding a charge even when not connected to the ATV
All batteries will die at some point. Some sooner than others, depending on the type of battery, how it’s used, and how it’s maintained.
Because of its small size and the rough handling an ATV battery must endure, it will generally not last as long as a car battery.
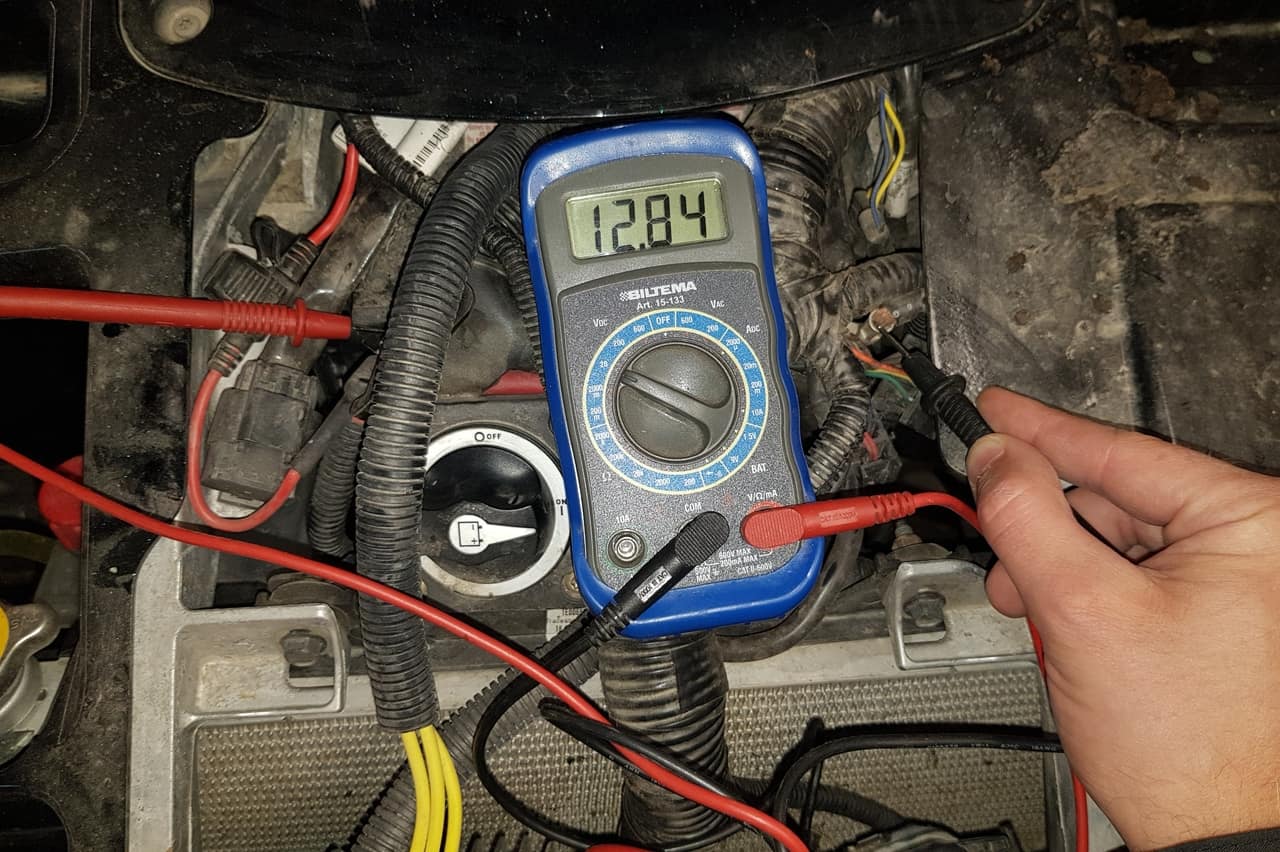
To test if your battery holds a charge, disconnect both terminals and fully charge the battery. Use a multimeter to read the voltage.
If it still loses its charge over a day or two, you likely have a bad battery. Notice that this behavior may be due to internal sulfation, which sometimes can be fixed—more on that further down.
If the battery does not discharge when left disconnected, the issue is likely not with the battery itself. If so, it’s more likely something on the ATV that is causing it to drain or causing it not to charge as it is supposed to.
Load test the battery
A better way to test if your battery is bad is by performing a so-called load test.
Ideally, you would want a load-tester to perform this test, but you can also do the test if you have a multimeter with a min/max function. This will not give accurate results, but it should give you a decent clue.
This test tells you if the battery can hold a high enough voltage level under heavy load. 9.6 volts is the magic number here. It needs replacing if your battery drops below this level under heavy load.
- Start by charging the battery. To perform this test, you want to ensure the open-circuit voltage available at the battery is above 12.4V (at least 75% charged). To read the battery voltage, set the multimeter to 20V DC or V if you have an auto-ranging meter. The red test lead goes to the positive battery terminal and the black to the negative. If the battery does not charge higher than 12.4 volts, it is likely too sulfated, and if you can’t get it to charge over 10.5 volts, it probably has a bad cell.
- Push the min/max button to start recording the voltage.
- Push the starter on the ATV. The electric starter draws a high current from the battery for a short period. It doesn’t matter whether the bike starts or not.
- Turn off the bike and have a look at your readings. If your lower reading is below 9.6 volts, your battery is bad. It no longer holds a sufficient capacity.
2. Low fluid levels in the battery
Suppose your battery is conventional lead-acid; you want to check that the fluid levels are correct. This quick and easy job should be done early in your testing before discarding the battery.
When the electrolyte levels are too low, the battery will not function as it should and may not take or hold a charge. This will be true whether the bike is being used or parked.
This tip only applies if your battery has removable covers over the battery cell ports. Batteries that do not feature this possibility are usually labeled maintenance-free and must be replaced when they stop working well.
Caution! Do not try to open a battery that is not made to be opened.
- Before you remove the covers, I recommend cleaning the battery thoroughly by wiping it with a rag sprayed with an ammonia-based window cleaner. You do not want debris falling into the ports, which may reduce capacity or damage the battery.
- After cleaning and drying the top of the battery, you can use a screwdriver to pry open the covers or unscrew them, depending on what type of covers you have.
- Use a flashlight to inspect each cell. The plates must be covered with electrolyte fluid, and each cell’s levels should be equal.
- Top off with distilled water until you reach the maximum safe level; the fluid should barely touch the bottom of the filler tubes.
- Severe sulfation would likely damage the plates if exposed to air. Sometimes, sulfated batteries can be brought back to life with a slightly reduced capacity simply by ensuring correct fluid levels.
- If the levels are low, you should check if the battery has any visible leaks, requiring replacing the battery.
- When the levels are correct, you should recharge the battery and check that it holds its charge.
3. Defective new battery
Even new batteries can be bad.
If you’ve done the tests and concluded that all systems are working correctly and that your problems must be caused by an old or bad battery that cannot be revived, you must purchase a new one.
But occasionally, you may find that the issue persists immediately or shortly after replacing the old battery with a new one.
This may indicate that you have not identified the root cause of the problem, but it may also be that you’ve received a faulty battery.
Even new batteries may short out, leaving them useless. To test this, perform a load test on the new battery as described in the step for old batteries above.
Your dealer should also be able to help you do this test to rule out any issues with the newly purchased battery.
When it comes to batteries, the whole “you get what you pay for” is usually very accurate, especially for ATV batteries that need to handle a lot of abuse from bouncing around, with a high chance of damage to the internal components. Get a good quality battery to save yourself from a lot of frustrations.
Ensure your new battery’s ratings are as good or better than the original. Compare amp-hour ratings and cold-cranking amps. You can likely find a better-capacity battery of the same size as the original battery.
4. A loose or corroded connection of the ground cable
Another possible issue that is quick and easy to address will be to ensure the main ground cable that goes from the battery to the bike’s frame is well attached on both ends, is not damaged, and that the terminals are not attacked by corrosion.
A bad or corroded connection will prevent the charging system from topping off the battery while riding and may cause a small parasitic drain.
Removing corrosion from the terminal or fastening loose connections may fix this issue.
Ensure your grounding is healthy before investing time and money in other possible issues.
5. The battery is sulfated
As mentioned earlier, if your charger tells you that your battery is fully charged, but you don’t get a reading of 12.4 volts or above when you test with a volt-meter, your battery is likely sulfated.
When your battery is sulfated, it loses its ability to hold a full charge and suffers from higher self-discharge rates. The sulfation may also give a false voltage reading, tricking the charger into mistakenly believing the battery is fully charged when it’s not.
I won’t go into the details, but sulfation is a natural by-product of the chemical process inside an acid-lead battery when it’s discharging. Usually, the process will be reversed when the battery gets charged again, where the sulfation is transformed back into electrolyte fluid.
But under some circumstances, the sulfation will harden and build up on the plates inside the battery. This hardened sulfation will not be reversed into electrolytes under standard charging.
You can never prevent sulfation completely, but it will happen prematurely when:
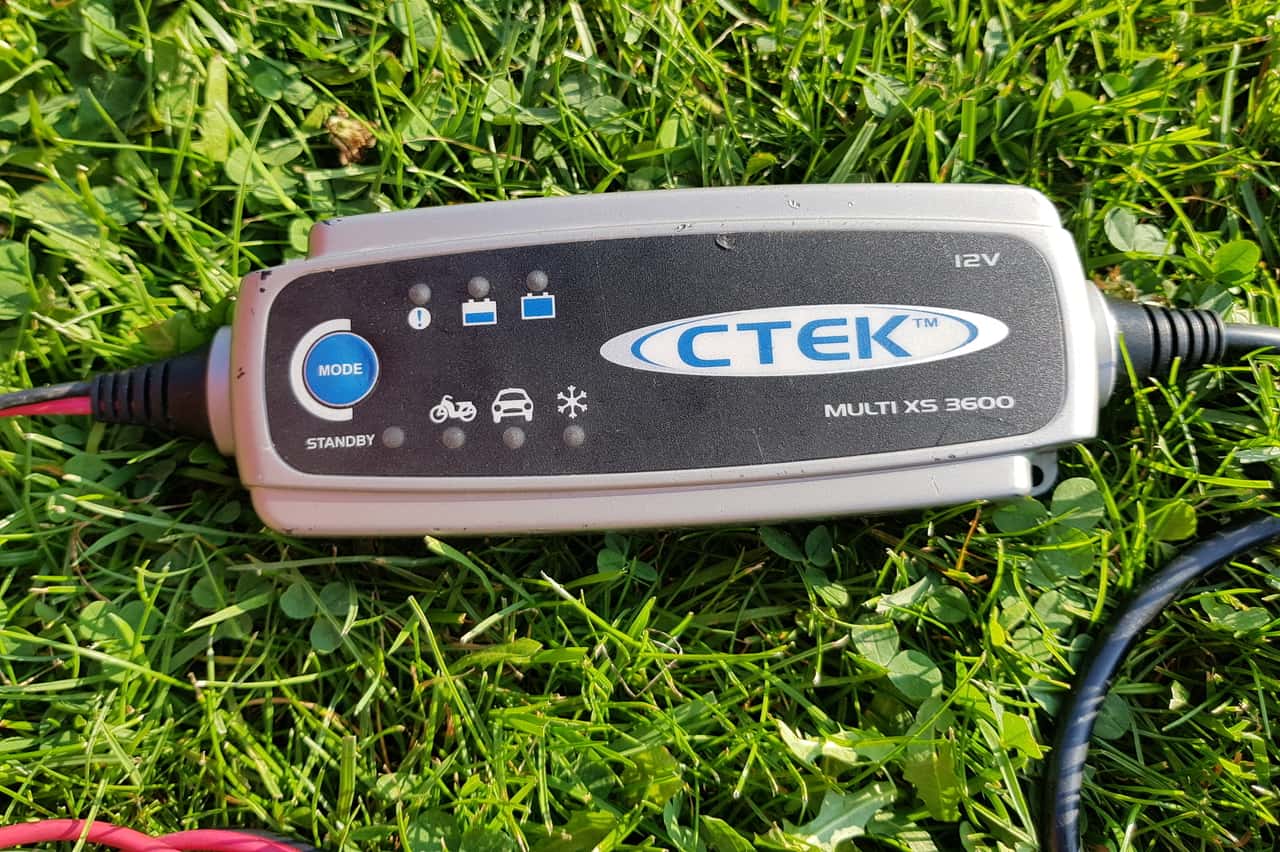
- The battery sits too long between charges. It’s a good idea to snap on a battery tender if it’s more than a few days between every time you use your ATV.
- The battery is not being charged to full capacity whenever it’s being charged. This is common on vehicles that use load-hungry accessories like a winch on an ATV, where the charging system cannot keep up. A faulty or underperforming charging system will have the same effect on the battery. Periodically it would be best to use a charger to attain full saturation. This may take up to 16 hours.
- Electrolyte levels are low. Ensure they are topped off to the correct levels as the plates sulfate when exposed to air.
- The battery is stored for extended periods with only a low or partial charge. Always store the battery fully charged, and preferably keep it connected to a battery tender to maintain a constant energy input.
- The battery is in a drained or discharged state, even only for a few days.
A battery with hardened sulfate can often be salvaged by performing a specific charging cycle. This will be described in a post of its own later on.
6. Something drains the battery overnight
If your battery is in good health and holds its charge when not connected to the ATV, but it’s being drained overnight when connected, and the ATV is just sitting with everything in off-position, something is drawing current.
This is known as “parasitic amperage draw.”
You must do some testing to diagnose and locate the circuit responsible for your battery’s draining.
The test is called a parasitic drain test and is something any home mechanic should learn how to perform.
Notice that reading voltage and amps differ and require different testing procedures. Mistaking a voltage reading for the amperage draw is a common rookie mistake.
While doing this test, please do not make the same mistake as I did once by sending a high current directly through the meter.
Doing something foolish like starting the ATV or even turning on the lights when the meter is connected will send a current much more significant than it’s designed to handle through the meter. In the best case, this will blow a fuse, or worse, it may fry your device.
Before we go into the actual testing, you should know that most modern ATVs today will always have minimal amperage draw, even when the key is turned off. This is due to electronics that always need some power to maintain different memory functions like a clock in your display, your ECU’s memory, etc.
The maximum amperage draw with the key turned off should be found in your specific bike’s user manual, but it should generally be less than 50mA (0.05A).
This draw is normal and irrelevant to why your battery drains overnight.
To perform the test, you will need a multimeter with the possibility to measure amperage draw. For this test to work, the meter should be able to read draw of at least 2-3A. Most multimeters are rated with a 10A or a 20 A capacity.
First, you will need to determine whether you have a parasitic amperage draw or not.
How to measure parasitic amp-draw
1. Start with a fully charged battery
The battery should read at least 12.4 volts. Set the multimeter to 20V DC or V if you have an auto-ranging meter.
With the bike turned off, put the black lead into the COM port and the negative terminal of your battery and the red lead to the voltage port and the positive terminal.
If the voltage is too low, charge the battery and let it sit for at least 30 minutes before you continue.
2. Ensure nothing is turned on
The key should be in the off position. Wait for 1-2 minutes after you turn off the key.
On some bikes, the ECU needs a moment to go into “sleep mode.”
3. Disconnect the negative terminal/cable from the battery
This test will work fine whether you disconnect the negative or the positive cable from the battery.
But with the positive cable disconnected, you risk shorting it against anything metal near the battery. In the worst case, this may severely damage your bike’s electronics.
That’s why I recommend performing this test by disconnecting the negative cable.
4. Set up your multimeter for the test
The black lead/probe should be in the COM port, and the red lead/probe should be in the amp port. Depending on your meter’s rated capacity, this port will be marked with either 10A or 20A.
Initially, do not use the mA port, which may damage your meter when performing this test. Turn the wheel on your meter to the DC 10A/20A position.

5. Connect the red probe to the disconnected negative battery cable
6. Connect the black probe to the negative battery post
This will use the multimeter to complete the circuit and measure how many amps are going through the circuit.
7. Note your readings
The reading in the display of your multimeter is the amperage being drawn from your battery.
This value should be under the rated maximum draw of about 0.05A. If you are over this value, you have a parasitic amperage draw. If so, you generally will have a reading of at least 1A.
If you get no reading, try switching the red lead to the mA port and measure again. Any large parasitic draw should be evident.
Suppose you did discover a parasitic amperage draw. In that case, you should continue with the steps below to diagnose the circuit and device responsible for your problems.
8. Keep the multimeter connected as described above.
9. Disconnect any accessories that work when the key is off
If your ATV is stock, nothing on your machine should draw current when your key is off, except the memory functions mentioned above.
If you have installed any accessories that will operate even when the key is off, you should disconnect these first to see if this eliminates the draw. This could be cell phone chargers, heated grips, winch, GPS, etc.
If your winch has a wireless remote, look for an on/off switch. Because if it’s left on, it will continue to search for a signal until the battery is drained, even when the bike is not in use.
Use the multimeter as described above to see if the draw disappears when the accessory is disconnected. If not, move on to the next step.
10. Locate the ATV fuse panel
Notice that some ATVs have more than one panel. You want to locate all of them.

11. Remove the fuses one by one
Remove fuses until the amp draw drops, indicating you’ve located a circuit causing an issue.
12 When reading a partial amp-draw
If you have more than one issue drawing current from your battery, you may experience just a partial drop when pulling a fuse.
For example, your reading may drop only from 2A to 1A when you pull a specific fuse, not below 0.05A. This indicates that you have more than one issue on your bike.
Leave this fuse out and continue pulling and putting back fuses one by one until you locate the other circuit drawing a current.
13. Remove the relays one-by-one
If the readings did not drop under the rated maximum levels by pulling fuses, you should also try removing relays one by one. A defective relay may fail to disengage and may cause a constant drain.
14. Reconnect the negative terminal to the battery
Read the current draw at the fuse terminal
Leave the fuse out and read the current draw across the fuse terminals using the multimeter. You should get about the same reading as when measuring the draw at the battery.
15. Identify which loads are on the circuit
Look at your user manual’s wiring diagram to identify which devices this fuse protects.
These are the devices you need to inspect further. If you don’t have the wiring diagram available, you can try starting the bike and test which functions are not working with the fuse removed.
16. Identify the faulty device
Check with the meter. When the amperage draws drop significantly, you have located your problem.
17. Troubleshoot why the device draws a current
The fault can be in the device, but you should also look at the wiring, connections, and switches.
Are any connections bad, or do you notice any wear or damage to the wiring, creating an electric bleed that will draw a current?
Please pay particular attention to where the wires are secured to the frame or where they may be rubbing against other components.
Is your 12V accessory plug full of mud? This would cause a drain; you’d be surprised how often this happens.
18 Look for damaged wiring
If pulling fuses didn’t help, look for loose or damaged cables that could be shorting out when riding.
7. Charging system not working correctly – bad stator or voltage regulator
When the engine runs, the ATV should get all the electricity it needs to operate correctly from the bike’s charging system. There should be no need to drain power from the battery.
The stator should generate enough power not only to operate all of the electronic functions of the bike but there should also be a surplus to charge the battery that has been drained a bit from starting the bike.
But sometimes, these systems go bad. There are some ways you can test if your bike’s stator is functioning as it should.
Reading battery voltage using the bike’s diagnostic mode
First, you can enter your bike’s “diagnostic mode,” if it has one, to get a reading of the battery voltage. Consult your owner’s manual on how to do this.
If your bike doesn’t have this feature, you can achieve the same readings by manually measuring the battery’s voltage with a multimeter.
Start the bike when the engine is cold. It should be a minimum of 13.5V when the bike is idling and rise to 14-14.5V when you rev the engine a little.
Then drive the bike for some minutes to heat the engine and test it again. Your readings should not change from your cold engine readings.
Low or no readings could indicate a bad stator. High readings could indicate a bad voltage regulator.
But before you conclude your issue and start buying parts, I recommend you do some further testing.
Testing the performance of the stator and voltage regulator with a multimeter
This method is written based on Polaris XP ATVs but should work fine on any ATV. Note that some of the components may have slightly different locations and appearances.
This test requires more technical experience than the others in this article. So if your comfort level has been reached just by adjusting the air pressure in the tires or changing a light bulb, you should probably ask a friend for help.
- Start with the bike turned off.
- Remove the stator side cover, usually on the left side.
- Three yellow cables should come out from the engine, going up to the ECU. The cables may be in different colors, but yellow is the most common. If unsure, see if you can get a hold of your specific bike’s wiring diagram.
- The wires will run into one flat plug on the side of the motor. Unplug this connection.

- With the bike still off, measure the ohms between all three wires. Measure between wires 1 and 2, then 1 and 3, and finally between 2 and 3. You should read no more than 3 ohms of resistance.
- Next, you want to test all three wires for continuity to ground. Many multimeters have this function, or you can use a continuity tester with a test light. None of the cables should be in continuity with the ground, so you should not get any reading (no beep) while performing this test.
- Then you should start the bike to let it reach normal operating temperature. Repeat the test in step 6. If all the numbers remain the same as your previous reading, your stator is probably good.
- Read the voltage regulator output. Plug everything back in and start the engine. A red and black cable should come out of the regulator. Read the voltage of the red wire; it should read about 14-14.5 volts.
- Read the battery voltage. Ideally, the battery voltage should read about the same as the voltage regulator output. If it doesn’t, you have a broken wire or a bad connection at either end of the cable.
A bad voltage regulator or ECM on EFI bikes
If you performed the above test (step 8) and got a reading above 14-14,5V at the battery, your bike is overcharging. This usually indicates that your voltage regulator is defective and needs replacing.
But often, the voltage regulator breaks because of a faulty stator. If the testing indicates that the stator is working fine, you can start by replacing the voltage regulator.
Regular voltage regulators you can usually find relatively cheap on eBay. ECMs are a bit more pricey. It’s worth checking if a recall is issued on your bike, as many early ECM were known to fail and were replaced for free by the manufacturer.
Overcharging is not good for your bike and can fry different electrical components and ruin your battery by boiling the electrolyte fluids in it.
If you’ve been riding with over-charging for some time, your battery may already be boiled dry, and this may be why the battery is being drained.
After fixing your charging system, you could try reviving the battery by adding distilled water up to the correct levels. Note there is no guarantee this will work; if it doesn’t, you need a new battery.
8. When riding, you use more electricity than the charging system can deliver
Even if you’ve gone through all of the steps in this guide and found nothing indicating an issue, you may still experience the battery drains while riding.
This cause is more common than you may think, mainly if you use many power-hungry accessories like a winch, GPS navigation, or a phone charger.
The purpose of the battery on an ATV is to power the starter motor when you start the bike and supply the needed electricity for functions used when the engine is not running. On ATVs, this generally boils down to anything that has a memory function or if you have connected a phone charger, GPS, or maybe a booming sound system to your bike.
When the engine runs, the electric power needed to run and operate the bike is delivered from the stator. But when you use more electricity than the charging system can provide, the bike must draw power stored in the battery.
The charging system on an ATV has nowhere near the power output you have on a car. A car uses a belt-driven alternator, while an ATV uses a much less powerful stator system.
Alternators are not used on ATVs because they have more moving parts, leaving them more prone to being damaged from the dirt, water, and rough handling they would need to endure on a quad. The stator is protected by being embedded in the engine itself.
This was never an issue on early ATVs as they did not need much electricity to function correctly. But over the years, the bikes have been fitted with more and more power-consuming features and electronics like power steering, electronic engine management systems, displays, and navigation systems. All of which need their share of electricity to function correctly.
The manufacturers have done a great job developing the stator system so that it will perform optimally. But even so, it sometimes cannot deliver enough power to prevent the battery from being drained even when riding.
9. Battery draining when plowing
Battery draining from plowing snow is the most common reason ATV batteries drain while riding.
However, with just a few simple adjustments to how you ride, you may be able to eliminate this issue.
Plowing requires you to raise and lower the plow repeatedly using the winch. And the winch is, as you may already know, one of the most power-hungry accessories you may have on an ATV. It will drain your battery in no time if used excessively over a short period.
Here are a few tips you can implement to prevent your battery from draining when plowing:
- Always plow in low-range gear if your bike has this option. This will increase your engine’s RPMs (revolutions per minute) compared to driving at the same speed in the high gear range. Higher RPMs mean the flywheel generating your electric power spins faster and gives higher output. This keeps the voltage regulator operating at full capacity, reducing the need to use energy from the battery to a minimum. As a bonus, riding in lower gears will decrease wear on your ATV’s drive belt.
- Make sure your battery is in good shape and not too old. When the battery gets older, it loses some of its capacity. And when plowing, you need all the power you can get. Consider replacing it with a new one if it’s starting to age. Get one with as high amperage hours as you can fit.
- Get a battery tender to top off your battery in between each time you plow. This is a cheap and easy way to ensure the ATV is always ready to go.
- If you still need more power, consider adding a second battery to power the plow. This requires you to charge the battery between each time you plow as the bike’s charging system is not designed to handle this amount of amperage hours.
- Reduce the bike’s overall electric power consumption by replacing headlights and taillights with LED bulbs, as this draws less current. Every little bit helps.
- This is a more fun alternative to using a battery tender: Go for a long winter ride each time you plow to allow the bike to recharge the battery. For people who use their bikes for casual riding throughout the winter, battery drain when plowing is usually not a problem. Usually, it’s those that only start the bike, plow, and park the bike again, which eventually run into problems.
10. Driving in extreme sub-zero temperatures
The performance of lead-acid batteries will suffer if you ride in extreme temperatures. The capacity will drop by about 20% in freezing weather, and when you hit -30 Celcius (-22 Fahrenheit), it will be down by about 50%. So one may say the temperature “drains” the battery even before you start using it.