
When handlebar grips wear out or become loose, you might as well cut them off as they are not worth keeping. But from time to time, it can be necessary to remove the grips without destroying them.
This post will cover three methods to help you remove the grips on one piece. Most of them require tools and supplies you would typically find in most homes.
How the Grips Stay on the Handlebars
Knowing how the grips stick to the handlebar, you’ll better understand how to remove them.
- The grips are made from sticky rubber or silicone that increases friction against the bars.
- The grips are made in a slightly smaller diameter than the handlebars. This ensures the grips squeeze against the bars when installed, increasing the friction.
- Some grips are installed using an adhesive, such as grip glue. Aftermarket grips may be installed using other types of adhesives, such as spray paint, spray glue, super glue, hairspray, or anything that sticks.
- On some ATVs, especially racing quads, it’s common to use safety wire to tighten the grips in place even better. The old safety wire has to be removed before removing the grips.
Three Ways to Remove Handlebar Grips Without Cutting
Removing handlebar grips without removing them is not always easy, and you may need to try several methods before you hopefully succeed.
The first method works great with dry-fitted grips, while you may need to use one of the latter methods if the old grips were installed using an adhesive.
1. Use Compressed Air
You will need an air compressor with a hose and air blower nozzle to use this method. This is how you do it:
Step 1. Peel Back the Grip Slightly
You need a small gap to get the air blower nozzle between the handlebar and the grip.
- Use a small screwdriver to create a small initial gap.
Step 2. Remove the Grip by Blowing Air From the Back of the Grip
- Hold the grip with one hand while you blow air inside with the other. The compressed air will make the grip expand a little, creating a cushion of air that keeps the grip lifted from the bar.
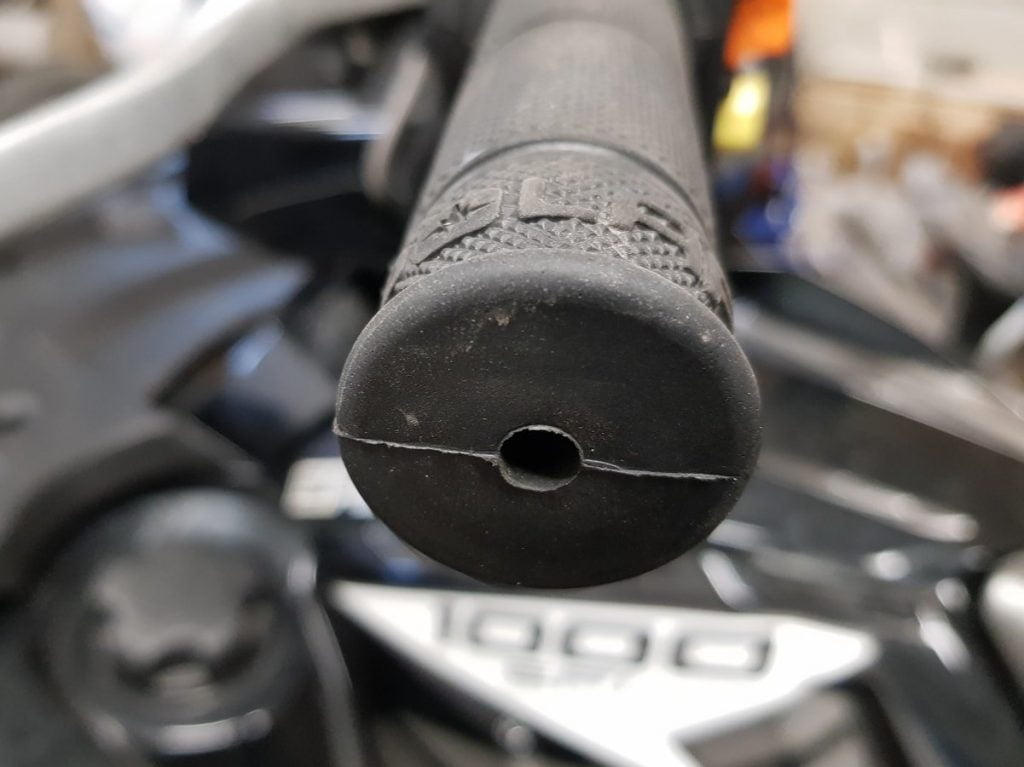
Step 3. Remove the Grip by Blowing Air Through the Grip End
You can also try poking a small hole at the end of each grip. Some grips come stock with holes for easy installation and removal.
- Cover one hole with duct tape as you blow air into the other. This will have the same effect as the method above.
- Rotate the grip and pull outwards as you keep applying air. If the grip is not completely stuck, you should be able to wiggle it outwards quite easily until it comes loose.

This method works with most grips, at least those not glued in place.
However, if you don’t have access to compressed air or are struggling with a stubborn adhesive keeping the grip in place, the following method may be just what you need.
2. Use a Screwdriver and a Solvent
When the grips are held in place with an adhesive like any glue, spray paint, or even hairspray, you need to break the bond before the grip moves.
Your best bet is to use a solvent, as this will dissolve the adhesive and act as a lubricant, making it easier to slide the grip off the handle.
Another benefit of using a solvent is that it will evaporate without leaving any residue, and when you are done, there is no need for cleaning.
If you don’t have access to a solvent, there are some less effective options you can try:
- Contact cleaner, isopropyl alcohol, rubbing alcohol, or any other alcohol-based solvent.
- WD-40 (downside: require cleaning)
- Vegetable oil (downside: requires cleaning)
- Soapy water, Windex.
- Water.
You will also need a flat object to pry between the handlebar and the grip. Here are a few options:
- A small flathead screwdriver
- A spring rod grip remover for golf clubs
- A metal bbq skewer
Step 1: Place the Vehicle in a Leaning Position
Lean the motorcycle against a wall, or park the ATV sideways on a slope. This will make it easier to pour solvent so that it flows along the handlebar and inside the grip.
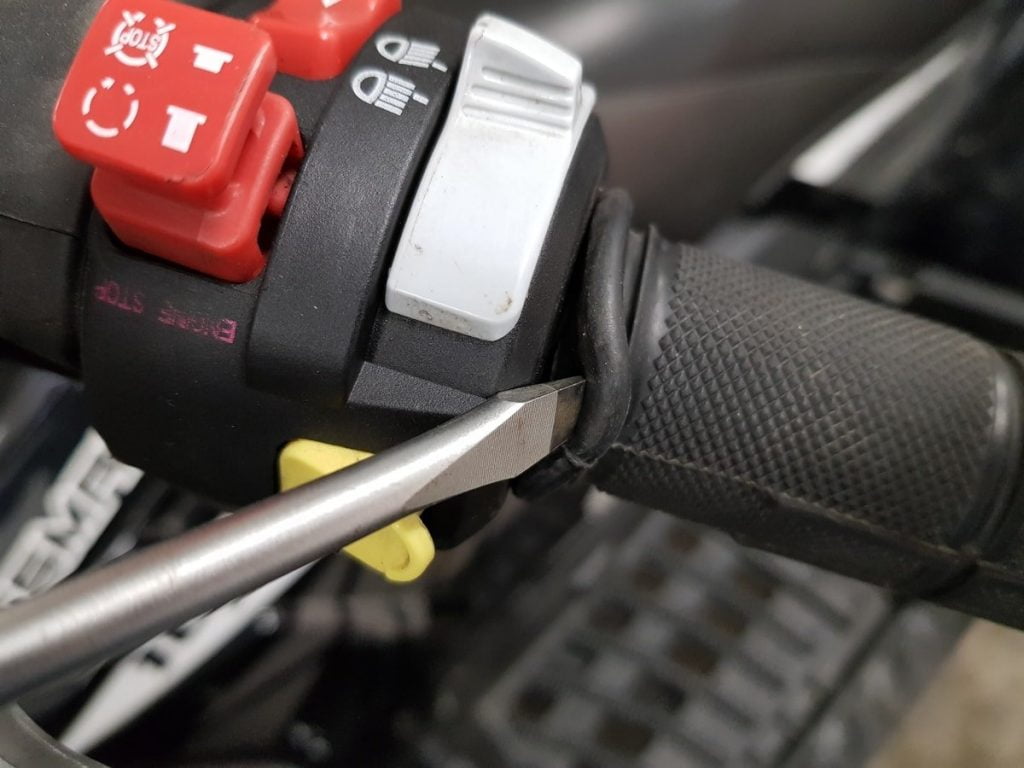
Step 2: Insert a Screwdriver Between the Handlebar and Grip
Wedge the screwdriver or whatever flat object you have at hand between the grip and handlebar to create a small gap. There is no need to push the screwdriver too far at this point. A small gap is sufficient to allow the solvent to begin seeping behind the grip.
Tip: Depending on the glue used to glue the grips in place, try heating it using a hairdryer, as this may make the glue less adhesive. Do this before you add a flammable solvent.
Step 3: Pour Solvent in the Gap Between the Grip and Handlebar
- Squirt, spray, or pour the solvent or whichever of the listed fluids above you decide to use into the gap you’ve just created.

Step 4: Work the Screwdriver Towards the End of the Grip as You Add More Solvent
- Now it’s a matter of working the screwdriver further underneath the grips as you continue adding more solvent.
If you use an alcohol-based solvent or water, feel free to use as much fluid as you need, as the leftovers will evaporate when you are done.
However, if you use WD-40 or vegetable oil, remember that everything needs to be cleaned thoroughly before installing new grips.
Step 5: Rotate the Grip as You Work the Screwdriver Around the Handlebar
- Twist the grip to both sides repeatedly to work the fluid well underneath the grip until it eventually comes loose.
- As you feel the grip begins to break free, start pulling it to the end of the handlebar in a twist-pull movement. Eventually, the grip will come undone, and you can slide it off.
3. Use a Kitchen Syringe and Solvent
Sometimes when the grips are glued solid to the handlebar, you may not be able to pour solvent between the grip and the handlebar.
You can use a basting syringe/marinade injector to inject the solvent as a last resort.
These types of syringes are sold at any kitchen supply store. Similar syringes are used in golfing to remove rubber grips from golf clubs.
- Fill the syringe with solvent or whichever fluid you choose.
- Poke the needle through the end of the grip, between the grip and the handlebar.
- Squirt a generous amount of solvent inside the grip.
- Remove the syringe and start working the grip in a twist-pull motion.
- You may need to apply solvent several places before the grip eventually comes loose.
Related Questions
How Do You Get a Stuck Handlebar Grip Off?
If neither blowing compressed air nor using a solvent like a contact-cleaner won’t make the grip come loose, you may need to cut it. Use a razor blade or a box opener and cut gently along the grip’s entire length from top to bottom.
Make sure not to cut through the rubber as it may damage the plastic inner layer or heating elements if your bike has them.
What Size Are ATV Grips?
Most ATV grips are ⅞ inches in diameter on both sides. Unlike motorcycles, ATV grips are the same diameter on each since they use a thumb throttle instead of a wrist throttle.
Wrapping Up
Handlebar grips are essential for a comfortable and secure grip on your ATV or motorcycle. Knowing how to remove them without causing damage is crucial, especially when planning to reuse them. Armed with the methods discussed in this article, you can confidently tackle grip removal and ensure a safe and effective process.